Showing posts with label main dishes. Show all posts

Tuesday, November 12, 2013

Grilled Chicken Pesto Pizza

It's that time of year again!  We love a good pie here a Double the Deliciousness! And so we're having another WEEK OF PIES this year!!  (you can check out last years pies: Blackberry Pie, Lemon Strat Pie, Pecan Brownie Pie, Blueberry Banana Chiffon Pie, and Pumpkin Chiffon Pie)
 

So join us next week EVERYDAY for a new pie recipe. We've already gotten a few knocked out and believe me you're not gonna want to miss them!

And join in the fun with your family and/or friends and have your very own "We're Thankful for Pie Night"!  We hold ours Wednesday Night before Thanksgiving so we can stuff our selves with pie before we're already stuffed with turkey and the goodies of Thansgiving dinner.  Have everyone bring a pie and then go to town.  I suggest cutting slivers or you may end up with your head in the toilet most of the night.  I speak from experience...didn't know if I'd ever be able to eat another piece of pie in my entire life...glad to say I still love pie!:)

So before we get to the week of glorious pie I figured we'd better give you a nice main dish. This one is a keeper, and if you have no self control (finger pointing at myself!) you may end up eating more than you would have liked.  I have problems.

Grilled Chicken Pesto Pizza
PRINT RECIPE

For crust:
1 1/2 cups water
1 tablespoons yeast
1 tablespoon sugar
3 1/2-4 1/2 cups flour

For topping:
Jar of basil pesto
1 tablespoon olive oil
2 boneless skinless chicken breasts
1 small yellow onion, thinly sliced
2 cloves garlic, minced or pressed
2 cups grated mozzarella cheese
1 large tomato, diced

Combine warm water (I always run the water until it's temperature is hot enough that I can barely keep my finger in it...not very scientific, but it's never failed me!) yeast and sugar and let sit untl yeast is bubbly.  Knead in the flour until a soft dough forms.  In your mixer, add flour until the dough cleans the side of the bowl.  Place dough in a bowl sprayed with cooking spray & cover.  Set aside.

Heat oil in frying pan over medium-high heat.  Cut chicken into 1 inch pieces and grill in hot oil (or you can just grill it outside and then cut into pieces) until cooked through and browning. Add the sliced onion and garlic and sautee until onions are carmelized, about 5-8 minutes. 

While chicken/onion mixture is cooking, spray counter (or rolling surface) with cooking spray and roll out dough into a circular shape. Place on pizza pan and work the dough with your fingers so it covers the entire pan.

Spread a thin layer of pesto over the dough, you will not need to use the entire jar of pesto.  Cover the pesto with the grated cheese.  Top with the chicken/onion mixture and diced tomatoes. 

Bake in the oven at 425 degrees for 12-15 minutes or until crust is browned and cheese is melted.

Amazing!

Tuesday, June 18, 2013

Chicken Cordon Bleu

Tony got the cutest Father's Day gift Sunday from our 2 youngest (Eli, 10 & Rhett, 6).  They brought home a DVD from church that their leaders put together for Father's Day.  It was an interview style set-up with one of their leaders asking them questions about their Dad.  It was HILARIOUS!!  They asked what was one thing that your Dad is good at, and then asked them to name one thing that your Dad is not good at.    Eli thought about it for a while and his answer was that "My Mom's never left us alone with my Dad for like more than a day because I think she doesn't think he's too good at cooking because we usually end up getting something store-bought."  Hahahaha!!  Totally crack me up!  Just shows who does most the cooking around our house.  (Although Tony does make a pretty awesome Omelet!)

Well, guess what?  Tony's going to be home with those 2 youngest all week long.  My oldest son is at Scout camp all week and Kyla and I are headed to girls camp today until Friday.  Guess they're going to have a lot of "store-bought" food!:)  

But at least they're last meal before all that "store-bought" stuff was a good one.  Actually, a GREAT one.
I've got a Chicken Cordon Bleu casserole recipe on here, and it is delicious and all, but this one today is THE REAL DEAL!  The addition of the mustard in the egg wash is perfect.  Gives it that little bit of tang that made this dish.  They really are pretty easy to throw together, so don't be scared and jump in...you'll love them!

Chicken Cordon Bleu

1 sleave Ritz crackers
4 slices whole wheat sandwich bread (homemade or store bought)
6 tablespoons butter, melted
6 slices ham (not too thin, you don't want them tearing when you roll them up)
2 cups shredded swiss cheese
6 boneless, skinless chicken breasts
3 eggs
1 1/2 tablespoons dijon mustard
3/4 cup flour

Preheat oven to 450 degrees.  Place crackers and bread in a food processor (or blender in my case) until they are ground into coarse crumbs.  While still processing, drizzle in the melted butter until combined.  Place crumbs on a cookie sheet and bake in the oven for about 5 minutes.  Stir the crumbs around at the half-way mark.  They should be nice and golden brown.  Place in a pie plate and set aside.

Turn temperature of oven down to 400 degrees.

Take chicken and cut length wise down the fattest part of the breast, do not cut through, just make a long slender pocket.  Place about 1/4 cup of the shredded cheese in the middle of a slice of ham and roll tightly.  Place rolled ham into the pocket of the chicken and make sure chicken covers all the ham.  Repeat with all 6 chicken breasts.

Place flour in a shallow bowl.  Beat eggs with mustard in another shallow bowl.  Take your chicken and cover in flour, then coat in the egg wash & then dredge in the cracker/bread crumbs.  Make sure the entire chicken is covered with crumbs.  

Place on a lightly greased cookie sheet that has a small lip (you don't want the juices running into your oven).

Place chicken in oven and bake for 35-40 minutes or until chicken is cooked through (should reach 160 degrees F).

Wednesday, June 12, 2013

Chipotle Chicken Skewers with Cilantro Lime Dipping Sauce (and our diet success..so far!)

As some of you know, my husband and I have been on a diet (I really hate that word, but for lack of a better one...) since February.  It has had it's ups and downs (the downs mostly came during the stressful month of May...and I have learned that I am a stress eater!), but it has been fantastic for us.  I've just briefly mentioned it a few times here on the blog, but went into more detail over at Or So She Says for one of my blog posts there, so if you'd like to know more about it head over there.  Or check it out at dukandiet.com.

We had family pictures taken last week...finally!  It had only been about 3 years since our last ones.  Sheesh!    Anyway, I absolutely LOVE them.  They turned out great!  And they really made me realize how much Tony & I have lost.  I wanted to see the difference side by side so made a "before" and "current...not our "after" just yet!" collage.  

WOW.

I cringe to see what we looked like in our "before" picture.  (That's the whole reason I'm having issues with posting this collage!)  I'm printing it off and hanging it on my fridge for those days (which have been many lately) that I just want a stinkin' brownie!  So here it is in all it's glory...


Okay, glad that's over...now, on to the recipe!

When I stumbled upon this recipe (Thanks Mel...LOVE her site!) I knew it was one that I needed to make and that could be adapted to fit our diet.   It was wonderful!  Just enough spicy for me (and I'm a wimp!) and paired with the cilantro lime dip...oooohhhhhh...divine!

You must try these!

Chipotle Chicken Skewers with Cilantro Lime Dipping Sauce
PRINT RECIPE

2-2 1/2 pounds boneless, skinless chicken breasts
1/4 cup packed brown sugar (we used equal amount of Stevia)
2 tablespoons cilantro
1 chipotle chile in adobo sauce, minced (scrape out the seeds unless you like your food pretty spicy!)
2 teaspoons adobo sauce from the chipotle chile can
1 1/2 teaspoons salt
1/2 teaspoon chili powder
1/4 teaspoon garlic powder
1/4 teaspoon black pepper
skewers, I prefer metal because I always forget to soak the bamboo ones and then they catch on fire!:)

Cilantro Lime Dipping Sauce
3/4 cup fat free sour cream (can use lowfat as well)
1/4 cup lowfat mayonnaise or greek yogurt (we opted for nonfat greek yogurt)
1/4 cup lime juice, from 2-3 limes
1/8 teaspoon garlic powder
2 tablespoons cilantro leaves, minced
2 green onions, finely chopped
1/2 teaspoon salt
1/8 teaspoon black pepper

Slice the chicken into 1/2 inch strips.  In a small bowl combine the sugar, cilantro, chipotle chile, adobo sauce, and spices.  Stir to combine.  Toss chicken and sugar mixture in a large ziploc bag until evenly coated.  Refrigerate at least 30 minutes or up to 24 hours.

About 30 minutes before grilling the skewers, make dipping sauce.  This will give it time in the fridge for all the flavors to mesh together.  In a small bowl combine all ingredients and stir.  Place in fridge until chicken is ready to serve.

If using bamboo skewers, soak for 30 minutes in water before grilling.  Preheat grill to medium-high (about 400 degrees).  Weave chicken onto skewers making a "rolling hill" pattern.  Use about 2-3 strips per skewers, depending on the length of skewer and chicken strips.  Some of mine I even used 4 on.   These tend to stick to my grill so I always use a coat of cooking spray before grilling.  Grill for about 7-9 minutes, turning midway through cooking time, or until cooked through.

Serve immediately with dipping sauce.

Monday, June 10, 2013

Navajo Tacos with Homemade Scones

This is a recipe that is requested often at our home and is a staple for whenever we have company over.  We served these last night and had a young man who had never had them before...he's from Louisiana, so he knows all about beignets (which is pretty much the same thing as a scone).  And so, instead of piling all the ingredients on top of the scones he opened up the top and stuffed them full...gotta say, it looked pretty delicious that way!  And I think he probably ate 4 of them!:)

Don't let the homemade scones scare you off.   They are really easy to make & are delicious!  This recipe makes a lot, but they are great leftovers and can also be frozen after they are fried and taste just as good warmed up.  My family likes to make some smaller sized ones and toss them in a bag with some powdered sugar, or slather them with honey butter.  They are also good with jam and are to DIE FOR with a little nutella spread on top!

Navajo Tacos with Homemade Scones
PRINT RECIPE


Scones:
2 tablespoons yeast
1/2 cup warm water
1/2 cup butter or margarine, softened
1 teaspoon salt
1/4 cup sugar
2 cups warm water
2 eggs
7-8 cups flour

For Navajo Tacos:
Scones
Chili ( Heres a great homemade recipe, or canned)
shredded cheddar cheese
lettuce
sour cream
sliced tomatoes
sliced olives

To make the scones:
Dissolve the yeast in the 1/2 cup of warm water.  While yeast is "growing", combine the butter, salt, sugar, water, eggs and 4 cups of the flour.  Mix in blender using the whisking beaters until smooth.  Change out the beaters for your dough arm and add the remaining flour until a soft, slightly sticky dough forms.  I gauge this by when the dough "cleans" the sides of my bosch.

You can put the dough in the fridge at this point if you are making it a head of time and just pull it out a half hour to 45 minutes before you are ready to fry them, or you can just start rolling them out and frying them right away.

Divide the dough in half and spray counter/rolling area with cooking spray (I think this works better than flouring your surface and it's a lot easier to clean up!) and roll dough until it is about 1/2 inch thick.  Use a pizza cutter to cut the dough into horizontal strips about 3" across and then do the same vertically.

Fry them in 350 degree oil until browned on both sides.  Watch them carefully...they brown quickly!  Transfer to a paper towel lined plate.

To assemble your Navajo taco:
Place scone(s) on bottom of plate.  Ladle hot chili on top of scones.  Top with cheese, lettuce, tomatoes, sour cream and olives.

Dig in!

Monday, June 3, 2013

Mexican Stuffed Shells

Looking for a easy, quick and yummy summertime meal to serve your family?  That's what I'm all about during the summer months!  And this one is delicious....kind of reminds me of the Creamy Baked Taquitos I LOVE, but in a shell instead of a tortilla.  And I have just as much love for this one as the taquitos!

Serve with some fresh fruit (some kind of melon is my first choice during the summer), and the Best Spanish rice.  One of my favorite meals!

Mexican Stuffed Shells


2 cups chicken breast, cooked and shredded
1 can black beans, rinsed and drained
3 green onions, diced
2 bell peppers, diced (I like color so I do 1/2 of a red, orange, yellow and green pepper, but any variation works!)
1 1/2 blocks (12 oz.) cream cheese, softened
1 can diced tomatoes with chilies (Rotel kind)
1/2 teaspoon cumin
1 cup picante sauce
1 package pasta shells, cooked al dente
1 1/2 cups shredded cheese (sharp or colby jack work well)

Cook pasta shells until al dente (you don't want them too soft they will cook some more in the oven).   Drain and set aside.

Mix chicken, beans, onions and bell peppers in a large bowl.  Set aside.

Beat cream cheese in electric mixer until soft and smooth.  Slowly add the diced tomatoes while continuing to mix.  Add the cumin and mix.

Combine the cream cheese mixture with the chicken mixture and stir until well combined.

Pour the picante sauce on the bottom of  a 9x13 inch baking pan.  Stuff shells generously with filling and place on top of picante sauce in pan.

Sprinkle cheese over top of shells and bake at 350 degrees for 25-30 minutes.

Thursday, January 3, 2013

Greek Pastitsio

Happy 2013 everyone!  There's so many goals we have for the blog this year, but our #1 goal is to bring you great & fabulous recipes 3 times a week.  That's a big undertaking and will take lots of preparation on our part, but we're determined!  Also, Kyla is going to take a bigger role...she's going to have 2-3 recipes a month that she is in charge of.  I may still have to help her with the blogging side of it, but she's going to be finding, taking pictures and making it pretty much by herself!  She really is a great cook & I'm excited to try some of her stuff (and not have to cook a few times each month!)

Hope you are as excited as we are for this new year!  And with that we'll get on to today's recipe.

Pastitsio just means a casserole layered with pasta, meat and cheeses.  Nothing too fancy about that, although it's really fun to say & it sounds pretty impressive.  But this recipe is more than just pasta, meat and cheeses.  Add the spices and vegetables to it and you've got a wonderful main dish.

(You can make this dish healthier by substituting whole grain penne, using lean ground turkey, light cream cheese, skim milk and part-skim mozzarella...yeah for all of us with that certain new year's resolution that I seem to have EVER SINGLE YEAR!!):)

Greek Pastitsio


1 pound (16 oz.) penne pasta
1 pound ground beef or turkey
1 large onion, chopped
5 cloves garlic, pressed
2 tablespoons flour
8 ounces cream cheese (light works well)
2 cups milk (skim is great)
1/8 teaspoon nutmeg
1 can (14.5 oz.) diced tomatoes, drained
1 cup shredded mozzarella cheese

Cook the penne pasta according to package directions.

While the pasta is cooking brown your beef or turkey with the onion in a large skillet over medium heat.  Season with salt and pepper.  Drain grease from skillet and then add the garlic and cook for about 1 minute. Sprinkle the flour over the meat and then stir to combine.  Break the cream cheese into pieces and add to the meat mixture.  Let it melt and little and stir to combine.  Pour in the milk, nutmeg, and tomatoes.  Stir to combine and then cook over medium heat until simmering.  Let simmer for 5-7 minutes until mixture is slightly thickened.

Stir the pasta into the meat mixture and then pour into a greased 9 x 13 inch pan.  Sprinkle the mozarella cheese over the pasta and place until the broiler for about 3-5 minutes or until cheese is browned.  Watch it really closely or you'll have black cheese!!

Remove from the oven and serve.

Monday, December 24, 2012

Orange Glazed Ham

Just in time for all you last-minute people out there...the perfect ham for your Christmas dinner!  We always have our Christmas dinner on the Sunday before Christmas because frankly I think I deserve a day off too.   So we always do easy fix-it-yourself type of stuff on Christmas day.  We usually have leftover ham or turkey from our Sunday Christmas dinner so we do ham or turkey sandwiches, and I always love to have my Deviled Ham Cheese Ball and crackers lying around for the snacking too.

But for you out there who like to have a nice fancy dinner this ham's for you.  It is super easy to do & tastes a-maz-ing!!  And I like that I can just buy a cheaper ham instead of the spiral cut ham and it is just as good if not better.  Always nice to save a little dough, especially at Christmas time!

We hope everyone has a wonderful Christmas spent with family and friends!

Orange Glazed Ham


1 ham, fully cooked (5-8 pounds)
1 cup packed brown sugar
4 Tablespoons freshly squeezed orange juice
1 teaspoon ground mustard

Place ham in a roasting pot and cover with a lid.  Bake ham at 350 degrees for 8-10 minutes per pound or until a meat thermometer inserted into the middle reaches 140 degrees.

Mix brown sugar, orange juice and mustard and pour over the ham when you have 20 minutes cooking time left.  Cover ham again and continue cooking for the last 20 minutes.


Delicious!  The orange in the glaze is perfect with the ham.  I just love it!  You can also substitute pineapple juice for the orange juice if desired.

Enjoy & Merry Christmas!

Wednesday, December 19, 2012

Lil' Cheddar Meat loaves

We finally got some snow today.  It is freezing outside.  I'm going caroling tonight with Kyla and a group from church in this freezing cold weather.  Oh, and it's my Anniversary!

14 years...holy cow how time has flown!  Can't believe Tony has put up with me for this long, he is the most patient man on the planet!  And just in case you don't believe me, this fact will make you a believer...he's a teacher!  2nd grade for the last 10 years and 3rd grade this year.  Just think about trying to teach 25 7, 8, and 9 year olds for 7 hours a day.......my point exactly!

Anyway, since we have other obligations tonight, we can't go out to eat to celebrate like we usually do.  So, I'm making one of my husbands favorite meals.  He may be eating it alone with the boys cause Kyla and I will be caroling...what a romantic evening!:)  Don't worry we'll make up for it sometime.

Lil' Cheddar Meat Loaves

1 egg
3/4 cup milk
1 cup shredded cheddar cheese
1/2 cup quick cooking oats
1/2 cup chopped onion
1 teaspoon salt
1 pound lean ground beef
2/3 cups ketchup
1/2 cup packed brown sugar
1 1/2 teaspoons prepared mustard

In a bowl, beat the egg and milk. Stir in cheese, oats, onion and salt. Add beef and mix well. Shape into eight loaves; place in a greased 9X13 baking dish. Combine ketchup, brown sugar, and mustard; spoon over loaves. Bake, uncovered, at 350 for 45 minutes or until meat is no longer pink. (45 minutes has always been plenty for me!)

Tony loves this with mashed potatoes, white gravy, and corn.  The perfect "guy" dinner!

Thursday, November 8, 2012

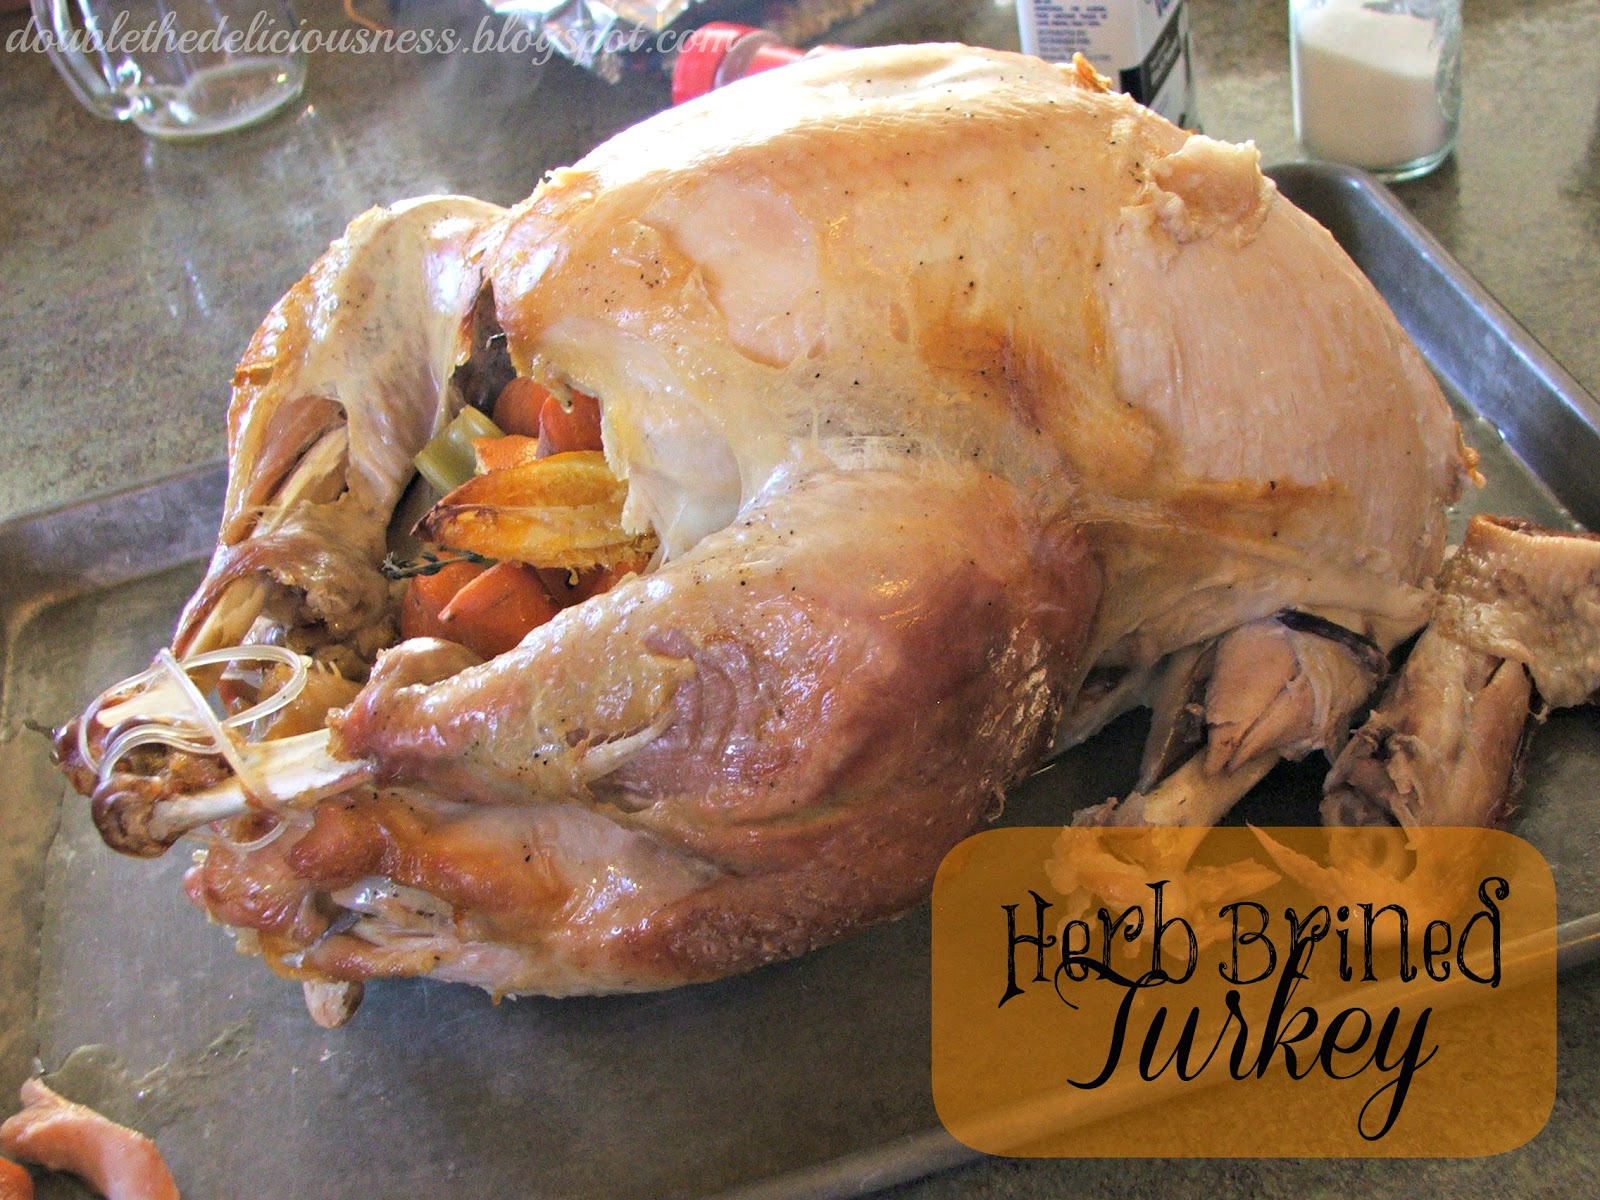
Herb Brined Turkey

Our family had our very first Thanksgiving with just our sweet family a few years back.  It was weird not being with extended family, but we've actually done it a couple of times since then as well & we kind of like it.  Not that we don't love being with family as well, but sometimes it's nice to just have your own traditions & a little less quiet!:)

So, anyway, on that first Thanksgiving by ourselves we decided to try our hand at brining our turkey. 

WE WILL NEVER DO IT ANOTHER WAY NOW!

The turkey was so juicy & flavorful...and the gravy made from the drippings was AMAZING!

This is now our go-to turkey method.  It is really easy since we always use a turkey roasting bag so we don't have to worry about basting.  This bird is fabulous!  Thanks to Emeril Lagasse for the fabulous recipe!

Herb Brined Turkey

  • 1 turkey (10-12 pounds)

  • For the Brine:
  • 1 cup salt
  • 1 cup brown sugar
  • 2 oranges, quartered
  • 2 lemons, quartered
  • 6 sprigs thyme
  • 4 sprigs rosemary
For the inside of the turkey:
1 large orange, cut into 8ths
4 tablespoons unsalted butter at room temperature
salt and pepper
1 large yellow onion, cut into 8ths
1 stalk celery, cut into 1 inch pieces
1 large carrot, cut into 1 inch pieces
2 bay leaves
2 sprigs thyme
2 sprigs rosemary
1/2 bunch sage
3 or 4 sprigs parsley

For the brine:  Dissolve the salt and sugar in 2 gallons of cold water.  I usually use my water bath canner, but you can use a clean bucket or large stockpot or even a heavy-duty food grade plastic storage bag.  Add the oranges, lemons, thyme, and rosemary.

NOTE:  We usually roast the biggest turkey we can find because we love leftovers.  So, if you plan to cook a bird bigger than 12 pounds and need more brine just add an extra 1/2 cup salt and 1/2 cup sugar to every gallon of water.  You just need enough brining solution to cover your bird.

Prepare your turkey by removing the neck, giblets and liver from the cavity of the turkey.  (This is my very least part...I usually make Tony do the honors!)
Rinse the turkey inside and out under cold running water.

Place turkey in the brining solution and cover.  Refrigerate for at least 4 hours and up to 24 hours.  I always start the brine on Thanksgiving eve.

When you are ready to cook your turkey, remove it from the brining solution and rinse under cold running water.  Pat dry with paper towels both inside and out.  Place turkey, breast side up, in a large roasting pan.  Rub the breast with one of the orange segments and rub on all sides with the butter, stuffing some underneath the skin (I actually like this part...I'm a freak I know!)  Season lightly inside and out with salt and pepper.

Place turkey in a turkey roasting bag and then stuff the turkey with the onion, orange, celery, carrot, bay leaves, thyme, rosemary, sage and parsley. 

Follow the baking instructions on the roasting bag.  

If you are inclined to make gravy...PLEASE, please, please don't throw away the drippings at the bottom of your roasting bag!  It makes the most fabulous gravy!

Here's how we make our gravy:

Measure how many cups of drippings you have.  For each cup of drippings you will need 1/4 cup of cold water and 2 Tablespoons of flour.

Heat drippings in saucepan over medium-high heat until boiling.  Mix cold water with the flour.  This needs to be mixed really well so that you don't have clumps in your gravy.  I usually put it in a mason jar and screw a lid on it and let the kids shake the guts out of it!

When boiling, add the water/flour thickening and stir until thickened.  This won't take long.  Pretty dang easy and you've now got  a killer turkey and gravy!!
Don't forget to make some awesome Creamy Mashed Potatoes to go with your gravy!

Tuesday, October 9, 2012

Beef & Broccoli for the Crockpot

My Crockpot has become my best friend lately.  It's so dang nice to already have dinner ready when it's dinner time...just throw everything on the table & it's ready to go!

And this recipe was really really good!  The beef was so tender it was falling apart on me.  When I stirred in the broccoli the meat just started shredding, so just be careful when stirring.
You can serve this over a pile of white rice or you can serve it with some Fried Rice.  Either way it is delicious!

Enjoy!

Beef & Broccoli for the Crockpot

1 pound thin beef (whatever kind you'd like)
1/4 plus 2 tablespoons soy sauce
2 tablespoons apple cider vinegar
2 tablespoons oil (you can use whatever flavor...if you like sesame oil that would work great, but I don't really like the taste so I always just use Olive oil.)
1 tablespoon brown sugar
2 cloves garlic, pressed
1/2 teaspoon crushed red peppers
1 bag (10 oz.) thawed broccoli florets

Add the soy sauce, vinegar, brown sugar, garlic and crushed red peppers to your crockpot; stir to combine.

Slice meat into thin pieces (if not already) and place in crockpot.  Toss the meat with the liquid to coat.

Cook on low for 6-8 hours.

An hour before serving add the thawed broccoli.  Cover and cook for another hour.

Stir together (remember to stir carefully or you'll have shredded beef & broccoli!)

Friday, September 28, 2012

Creamy Crock Pot Spaghetti

I love being a busy Mom.  And I love that my crock pot can help me be a busy Mom and still have dinner with the family in that 1/2 hour of free time we have in the evenings!  I think we'd get pretty sick of fast food as would my pocket book without my dear sweet crock pot.

This is one of my favorite crock pot meals.  I'm not really a traditional spaghetti fan.  I like baked spaghetti's & crock pot spaghetti, but just the sauce over cooked noodles...not so much.  I am also a lover of all things cream cheese.  It makes all the difference in this recipe, but even my "I hate cream cheese" son loves this it.

Try it out, you won't be disappointed!

Creamy Crock Pot Spaghetti

1 pound ground beef or turkey
salt & pepper to taste
1 teaspoon minced garlic
3 jars (26 oz.) spaghetti sauce
1 pound spaghetti noodles
3/4 cup shredded Parmesan cheese
4 oz. cream cheese
1 can (14.5 oz.) chicken broth

Brown meat over the stove with the garlic.  Salt & pepper to season.


Pour one can of spaghetti sauce in the bottom of your crock pot.  Break the spaghetti noodles in half and put them on top of  the sauce.


Spread the ground meat over top the spaghetti noodles.


Grate the Parmesan cheese.  I love freshly grated Parmesan, not a big fan of the pre-shredded stuff.


Put chunks of the cream cheese on top of the meat and then sprinkle with the Parmesan cheese.  (you can use the powdered Parmesan cheese here too...about 1/2 cup.)


Pour can 2 of your sauce over the cheeses.


Cover and cook on high for 3 hours.  After the 3 hours give it a good stir.  It will be thick!  Add the last jar of sauce & the can of chicken broth and stir to combine.  Let cook for 1 hour longer.  Serve or turn to warm/low until ready to serve.

Oh, and it makes quite a bit.  About 10-12 servings, but I think it's just as good if not better the next day warmed up in the microwave...perfect for lunch!:)

Tuesday, September 4, 2012

Steak Fajitas (or chicken!)

I've been getting some awesome fajita vegetable packs from Bountiful Baskets the last couple of weeks.  So we've been eating a lot of fajitas!  And I'm not complaining.  My mouth is watering just thinking about them!
 
The marinade for the meat is out of this world.  We've used both chicken and steak & I can't decide which I liked better, they are both awesome in the marinade.  And the peppers & onions...oh my!  They are to die for!  I could just eat them without any meat!
 
Steak Fajitas

1 1/2-2 pounds steak or chicken
1/2 cup lime juice (from the bottle)
2/3 cup water
4 tablespoons canola oil
4-5 cloves garlic, minced or pressed
2 tablespoons white vinegar
1 1/2 tablespoons soy sauce
1 tablespoon liquid smoke
1 teaspoon kosher salt
1 teaspoon chili powder
1 teaspoon cayenne pepper
1/2 teaspoon black pepper
1/2 teaspoon onion powder
1 large onion, thinly sliced
1 1/2 red bell pepper, sliced
1 1/2 green bell pepper, sliced

Cut meat into strips, about 1/2" wide by 3" long...approximately.:)  Combine lime juice, water, oil, garlic, vinegar, soy sauce, liquid smoke & spices.  Reserve about 1/4-1/2 cup marinade and keep in the fridge.  Place meat in a large Ziploc bag.  Pour the marinade over the meat and refrigerate for at least 4 hours, but preferably overnight.

Grill meat over medium high heat.  During the summer this is perfect, but during the winter you could use an inside grill (like a George Foreman), or broil them in your oven, or pan fry them.

While the meat is cooking, slice peppers & onions.  Don't they look gorgeous?!


When you're done slicing, begin to saute your peppers & onion in a large skillet with the reserved marinade.  Cook until the peppers are crisp-tender, about 7-9 minutes.


When the meat is done, add it to the peppers & onions.


Serve immediately.


We love these with some fresh guacamole (my favorite way to make guac is just to mash avocado with some lime juice, salt, pepper and garlic powder to taste!), Garden Fresh Salsa, sour cream, and cheese on either flour or corn tortillas (depending on which child you are:)).  And of course we always serve this with Caleb's (oldest son) favorite Spanish Rice!!

Related Posts Plugin for WordPress, Blogger...