Showing posts with label Cookies. Show all posts

Wednesday, August 28, 2013

Lemon Ricotta Gems

You may remember when I shared these wonderful cookies over at Mariel's Or So She Says' Blog Hop back in May, (check it out...there's a bunch a great ideas with lemon for the theme!) but for those of you who didn't...here's another chance at these! 
 
I love lemon!  Case in point...Lemon Cheesecake bars, Lemon Strata Pie, Lemon Brownies, Crack Cookies (aka Lemon Drop Cookies), Perfectly Lemon Cupcakes, and a bunch others.  One thing I just love about lemon desserts is that they belong in any season!  There are some types of desserts that are practical for different seasons, like pumpkin in the fall & peppermint in the winter, but lemon is great for fall, winter, spring & summer!  Yes! 
 
Lemon Ricotta Gems

2 1/2 cups flour
1 teaspoon baking powder
1 teaspoon salt
1/2 cup (1 stick) unsalted butter, softened
2 cups sugar
2 eggs
1 container (15 oz.) whole milk ricotta cheese
zest and juice of one medium lemon
Glaze:
2 1/2 cups powdered sugar
zest and juice of 2 medium lemons
 
Preheat oven to 350 degrees.
 
Combine flour, baking powder and salt in a medium bowl. Stir to combine and set aside.
In an electric mixer beat the butter and sugar until light and fluffy, about 2 minutes. Add the eggs, one at a time and beat to incorporate between each egg. Add the ricotta cheese, lemon juice and zest and beat until combined. Mix in the dry ingredients until combined.
 
Line baking sheets with parchment paper or a silpat. Using a 2 tablespoon size (medium) scoop, place cookies on baking sheets. Bake for 13-15 minutes or until the edges just start to get golden brown. Let cookies sit on baking sheets for about 5 minutes and then transfer to a wire rack to cool completely.
 
Make the glaze by combining the powdered sugar, juice and zest. If too runny, add a little more powdered sugar and if too solid add some more lemon juice until it reaches the desired consistency. Spoon or drizzle glaze over cookies. The glaze will harder after an hour or so and then they can be stacked in a container for delivery…or a late night snack!

Thursday, March 14, 2013

Perfect Sugar Cookies with Glaze Frosting

It is Selection Sunday this Sunday, just in case you were wondering.  I LOVE this time of year, not only because I absolutely love spring, the warmer weather, longer days, flowers, trees budding, baseball, sandwiches & salads, etc. but also for March Madness!  It's a family tradition for everyone to fill out brackets and battle it out to see who gets the most right.  We love the upsets, but also love our Kentucky Wildcats!  They are almost always picked to at least make it to the Final Four if not win it all by almost everyone in our family.  If we don't, my Kentucky born & raised Mom threatens to kick us out of the will.:)
So if you're March Madness addicts like we are, these cookies will be perfect for you!  This is the best sugar cookie recipe I have found over the years of trying about fifty-thousand different ones! (I exaggerate just a bit).  But honestly these are so soft & delicious.  Add a little lemon or almond extract and you can just eat these plain...so good!

Or, you can make this glaze frosting and turn them into something special!  Like a basketball.  I like this frosting because it actually tastes good.  Most glaze (or royal icing) frostings I've tried look beautiful, but turn super hard and not to tasty.  This one is not classified along with those in the taste department, but it still looks as beautiful.  The great thing about glaze frosting is that it hardens (not quite as hard as regular royal icing) so they can be packaged and the icing won't get all messed up like a buttercream frosting would.  

We made a bunch for my son's basketball team with their numbers on them for the end of the season party they had.  We tied them in celophane bags with green and white ribbon, their team colors.  (picture at end of post)  You could do the same with your family's favorite team colors for the tourney.  

Doesn't that sound nice...March Madness with a big soft delicious cookie!

Perfect Soft Sugar Cookie with Glaze Frosting
 
1 cup butter, softened
2 cups sugar
2 eggs
1 cup sour cream
1 teaspoon vanilla
5 cups flour
1/2 teaspoon baking soda
4 teaspoons baking powder
1/2 teaspoon salt

Cream butter and sugar until light and fluffy, about 3 minutes.  Mix in eggs, sour cream and vanilla until combined.  Add flour, baking soda, baking powder and salt and mix until dough forms.  Dough will be quite sticky.  Place dough in container and chill in refrigerator at least 1 hour.  

When ready to bake cookies, flour surface generously and roll dough out about 1/4 inch thick.  Cut into desired shapes and place on ungreased baking sheet.  

Bake at 350 degrees for 8-10 minutes.

Glaze Frosting:
3 3/4 cups powdered sugar
1/4 cup plus 2 tablespoons milk (any variety works)
1/4 cup plus 2 tablespoons light corn syrup
1 teaspoons almond extract

Combine sugar and milk until smooth using a whisk.  Stir in the corn syrup and extract.  Color about 3/4 of the frosting orange and the rest black.

First, you need to pipe the outline of your cookie.  This glaze needs to be a little more stiff than what you will use for "flooding" the cookie.  Take about 1/3 of your orange frosting and add a little more powdered sugar until it runs off of your whisk in a slow, thick stream.  Pipe the outline of your cookie.  Let sit until hardened.

Now use what's left of your orange glaze and "flood" the cookies.  The piped outline will help it from running over the sides, just place a little amount in the middle of your cookie and use a toothpick to spread it to the edges.  If glaze is too thick to pipe just add a little more milk until it runs smoothly and quickly off your whisk in a thin drizzle.  Let sit until hardened.

Now thicken your black frosting to same consistency as what you used to pipe the outline.  Pipe on your basketball lines (and "x" and then curves on each side).  You can then put on players #'s or not...your choice.:)  Let sit until hardened (overnight is best) and then place in celophane bags and tie with ribbon of your choice.  You can also make little tags to go with it.  FUN. FUN. FUN.

(That's my boy...#7!!)


Glaze recipe adapted from Our Best Bites

Monday, October 1, 2012

Chocolate Melt Cookies

What do you do when you miss an appointment (I mean just totally spaced it!) with one of your child's teachers?

Bake an "I'm so sorry" goodie!

My hubby Tony brought home a couple of bags of these new Hershey's baking melts.  He was supposed to get just regular old chocolate chips, but all he saw was the "Milk chocolate" and so he grabbed and went.  He's not a big semi-sweet lover!  So I figured I'd use these to help smooth over my goof!

I whipped up these cookies to take to our rescheduled meeting and put them in a cute bag with a cute tag.  For me, baked goods can fix anything, so that's what I was hoping!:)

(stay tuned at the end of the post if you'd like to see what I got to watch while making these cookies...it's so creepy & cool all at the same time!)

Chocolate Melt Cookies
PRINT RECIPE

1 cup (2 sticks) butter, softened
3/4 cup granulated sugar
3/4 cup brown sugar
1 teaspoon vanilla
1 egg
2 tablespoons corn starch
2 1/4 cup flour
1 teaspoon baking soda
1 teaspoon salt
1 package (9.5 oz.) Hershey's Milk Chocolate Baking Melts

Heat oven to 325 degrees.

Beat butter, sugars, and vanilla until well blended.  Add the egg and beat well.  Add the corn starch, flour, baking soda and salt.  Mix until combined.  Stir in chocolate melts. 

Scoop cookie dough onto ungreased cookie sheet.


Bake for 11-13 minutes.  Cool for 2 minutes on baking sheet then transfer to a wire rack to cool completely.  


Makes about 3 dozen cookies.

For those of you who like the "creepy but cool", here's what I got to watch out my dining room window as I was preparing these cookies.


These spiders (we called them cat face spiders growing up...not sure if that's right or not) spin the most beautiful webs, but boy are they UG-LY!!  There are 3 webs in a row between these 2 lilac bushes.  If you look at the top picture you can see one spider on the 1st web and one on the last web.

Super gross...but interesting to watch, especially when I've got 10 feet and a glass window between us!!:)

Thursday, September 20, 2012

Andes Creme de Menthe Cookies

Anyone else have some major Pinterest fails?  

I'm talking about seeing a recipe that looks out of this world delicious on Pinterest that you know you just have to make ASAP.  So you get all the ingredients, prepare and present only to have the dish fall WAY short of your expectations?

I had one of those experiences this week.  I found some Enchilada peppers stuffed with black beans and quinoa that looked so good, I thought I'd try them.  They were okay, but not something I'll ever make again.  

UBER disappointing!!
(I had to look up that word just to make sure I was using it in the right context...did you know it's a German word for above or over?  Learn something new every day!:))

I took pictures throughout the process and they looked fabulous & I even thought about still sharing the recipe here, because I thought maybe someone out there would think it was heavenly.  But then I decided if it's not something I LOVE, I don't want to be responsible for other people's (possible) failed dinners!

Everything here is something I without hesitation would make again.  So, as long as you have taste buds like mine, you're going to love the recipes here!:)

Especially these cookies!!  They are perfect...and I'm not the best cookie maker in the world.  I have problems getting them just right.  Sometimes they go pancake flat & other times they don't flatten at all and are crumbly & dry.  So when I find a cookie recipe that turns out as perfectly as these cookies, I SHARE!!  

You're welcome!

Andes Creme de Menthe Chunk Cookies

1/2 cup butter, softened
3/4 cup brown sugar
1/2 cup white sugar
1 teaspoon baking soda
1 teaspoon baking powder
2 teaspoons vanilla
2 eggs
1 package (10 oz.) Andes Creme de Menthe Baking Chips
2 2/3 cup flour

Add butter, sugars, baking soda & powder, vanilla and eggs to your mixer.
(LOVE my Bosch!)


Beat until combined.  Don't worry if the butter is still a little clumpy.


Add the baking chips (YES, the whole bag!!) and the flour.


Mix until all ingredients are combined.  The mint smells so good!


Put dough in a bowl and refrigerate for 1 hour. This is the hardest part...waiting.  I've never skipped this part so don't know if they will work if you just cook them right away.  Like I said, if I find a cookie recipe that works I stick with it!:)


Remove dough from fridge and scoop dough onto a cookie sheet.


Bake at 350 degrees for 8-10 minutes.  Cool on pans for 2 minutes before removing to wire rack.


Try just eating one...and good luck with that!:)

Tuesday, August 7, 2012

Soft & Chewy Snickerdoodles

When Kyla asked me the other day if she could bake something I was so exhausted that I told her that as long as she could do it on her own & make sure every dish she used was washed and put away that it was fine.

Well, she made THE BEST snickerdoodle cookies I have ever had!!  And everything (but 2 cookie sheets that were still hot) in the kitchen had been cleaned up and put away!  And so I got to be lazy on the couch and enjoy a few cookies while veggin' and watching the Olympics.  What more could a Mom ask for?

These cookies were so soft & chewy (thus the name) and stayed that way the next day as well.

Soft & Chewy Snickerdoodles
Recipe adapted from Jamie Cooks It Up!

1 cup butter, softened
1 1/2 cup sugar
2 eggs
3 cups flour
2 teaspoons cream of tartar
1 teaspoon baking soda

Cinnamon Sugar Coating:
3 tablespoons sugar
2 teaspoons cinnamon

Cream the butter and sugar for 3 minutes.  Add the eggs and beat for a couple more minutes.

Combine the flour, cream of tartar, and baking soda in a separate bowl.  Add it to the creamed mixture and mix until combined.

Lightly spray cookie sheet with cooking spray. 

Mix cinnamon and sugar in a small bowl.  Scoop cookies balls into the cinnamon/sugar mixture and roll until they are coated.  We love to use the cookie scoops for this step...it works wonders & is so much faster, but you can definitely just use your hands for this step.

Bake at 375 degrees for 8 minutes.  Leave them on the cookie tray for 5 minutes before removing to a wire cooling rack.

Thursday, July 12, 2012

Brownie Chunk Chocolate Chip Cookies

This is one of my favorite cookies ever.  It takes a little more planning and time than a "normal" cookie, but it is so. worth. it!!!

You really can't go wrong with brownies and chocolate chip cookies, and to add the two together just makes the best cookie ever!

Brownie Chunk Chocolate Chip Cookies
Recipe from Picky Palate
1 cup (2 sticks) unsalted butter, softened
3/4 cup granulated sugar
3/4 cup packed light brown sugar
2 large eggs
1 tablespoon vanilla
3 cups flour
1 teaspoon baking soda
1/2 teaspoon kosher salt
1 cup chocolate chips
2 cups cubed prepared brownies (I just used a boxed brownie mix...2 cups was about 1/3 of a 9 x 13 pan. I'm certain you could use any brownie recipe for this!)

Preheat oven to 350 degrees.

Cream butter & sugars until light & fluffy.  Add the eggs and vanilla and beat until well combined.

Place the flour, baking soda, and salt into a large bowl, mixing to combine. I gotta be honest...I usually always skip this step because I know my bosch will mix it in fabulously, but since I didn't have a bosch to use I went ahead and did this step. Slowly add dry ingredients to wet ingredients and mix until combined. Add the chocolate chips & brownie chunks and stir until just combined.

Use a medium scoop and scoop dough onto a greased baking sheet. Bake for 9-11 minutes. Let cool for 5 minutes before removing to a cooling rack.

Makes about 3 dozen cookies

Pour yourself a glass of milk & enjoy the best of 2 worlds...brownies & cookies!!

Monday, April 2, 2012

Chocolate Cherry Whoopie Pies

What do you do when you have leftover frosting in your fridge that you don't know what to do with?

Make Whoopie Pies!

I had some leftover Cherry Cream Cheese frosting from our Cherry Limeade Cupcakes that I didn't want to go to waste.  So my mind went straight to Whoopie Pies. 

These turned out delicious.  If you like chocolate and cherries you'll love these little guys! 

Chocolate Cherry Whoopie Pies

1 box Chocolate cake mix
1/3 cup vegetable oil
2 eggs
1 cup semi-sweet chocolate chunks
Preheat the oven to 350 degrees. Spray your cookie sheets with cooking spray.
In a large mixing bowl combine the cake mix, oil, and eggs and beat until just blended.  Stir in the chocolate chips.
Drop onto cookie sheet using a medium cookie scoop (or about 1 1/2 tablespoons) and bake for 11-14 minutes.
Transfer to a wire rack and let cool completely.
Now to make the frosting:
2 cups powdered sugar
1/4 cup butter, softened
2 oz. cream cheese, softened
1 tablespoons maraschino cherry juice
(You could also use cherry extract.  Just use 1/2 teaspoon of that and then add milk for the rest.  Also add red food coloring)

Beat cream cheese and butter.  Add the remaining ingredients until you reached desired consistency.

Once cookies are cooled, flip half of them upside down and pipe on frosting.  Place another cookie on top & you've got yourself a whoopie pie!

Monday, March 5, 2012

Homemade Oreos

This one's gonna have to be short.  I've got laundry piled up to my ceilings.  Every hamper in my house is completely over-flowing & it is driving me crazy.  So today's task is to get every. last. piece. of. dirty. clothes. washed! 

And then I'm going to stay up on it and NEVER have this problem again! 

Ok, so it'll probably be this way again next week, but here's hoping!:)

This recipe will cheer up any situation & make you want to take on the world (or your laundry).

Homemade Oreos
Recipe from Your Cup of Cake
Pin It
1 box devil's food cake
2 eggs
1/3 cup oil

Frosting:
4 oz. cream cheese, softened
1/4 cup butter, softened
1 1/2-2 cups powdered sugar
1/2 teaspoon vanilla

Preheat oven to 350 degrees.

Mix cake mix, oil, and eggs in a mixer.  The dough will be thick and sticky.  Scoop dough (about 3 tablespoons) onto cookie sheet.  Gently pat down the dough so it makes a nice thick disk, don't pat it down too much.

Bake for 7-10 minutes.  Let cool completely on a wire rack.

Make frosting by beating the cream cheese and butter together until combined.  Add the vanilla and powdered sugar until you have a nice smooth frosting.

Frost the bottom of one cookie and then place the other cookie on top.  These are delicious!

Friday, February 10, 2012

Chocolate Covered PB Sandwich Cookies (with other Valentine Ideas)

These are so easy I don't know if you can officially call it a recipe, but we absolutely love them here at my house and they make a really cute and fun Valentine's treat, so I figured I'd share them anyway!

Chocolate Covered PB Sandwich Cookies
Pin It
Ritz Crackers
Creamy Peanut Butter
Chocolate (or Vanilla) flavored Almond Bark

Spread PB on one side of ritz cracker and place another ritz on top to make a sandwich. (see how easy!)  Place on wax paper.  Melt Almond Bark and coat each sandwich and place back on wax paper.  Decorate with sprinkles of your choice!  Let chocolate harden and then they are ready to eat!

Can also coat in Vanilla Almond Bark


So easy, yet so delicious! (our motto!:))

Also, in case anyone is interested:
 
My kiddo's absolutely love this tradition we started 4 or 5 years ago.  They get so excited to make these and take them to their teacher!  A good old classic Candy Bar Card.  I let them write it (so it's not perfect, which kind of bothers me, but it's more personal for their teacher's and they love doing it...so it's OK!:)) and glue on their candy.  This year Eli decided he wanted to make a little puzzle for his teacher.  He put heart stickers all over it and told his teacher she had to find all 8 of them!:)  Such a fun kid!

Here's the words just in case you can't read the picture:
Dear (Teacher),
The "Reisen" for this card is to wish you a "Happy Valentine's Day" (Box of chocolates or something else that says Happy Valentine's Day on it).  You are great and "skor" a perfect 10 as a teacher.  I'd like to give you an "extra" "Payday" or "100 grand" for all you do.  I know you are "good and plenty" busy with "mounds" of work, but both "now and later" you are a "lifesaver" as you "dove" (in the past I've been able to find Dove candy bars, but this year they were no where to be found, so we ended up buying a package of small dove chocolate and they say "dove" on them so it worked out!) in to help me out of any "crunch" I may be in.  You're helping me to not be an "airhead" (alternate that we've used is "you're helping me to become a "smartie").  I could search the universe including a "starburst" (can also use Mars bars, but we couldn't find those this year either) and the "milky way" and would never find a teacher better than you!  Thank you!
"hugs" (Student name)

And, this we started a couple of years ago with my hubby's class (he teaches 2nd grade).  We wanted to find something different and special that he could give his class and we saw this idea (sorry...I have no idea where) and loved it!  His students have loved it...they think it's pretty silly!:)  We just attach the card to bag of candy with some Valentine garland and it's ready to go!
 

Tuesday, January 10, 2012

Lemon Poppyseed Whoopie Pies

This will be short and sweet since I've got about a quadrabillion things to do today!  We're flying out tomorrow for Kentucky to attend my Grandma's funeral.  Oh, how I LOVE that lady!  It's a bitter-sweet time for me.  I'm sad that she's gone, but I get to return to Kentucky where my Mom grew up and to the place where I spent weeks at a time during the summers with my family growing up.  Lot's of good memories, and I haven't been back in over 15 years.  It'll be hard going knowing she won't be there to greet me, and staying in her home that I have so many memories of her in............Oh my goodness!  I had to take a little break, I got myself going again...couldn't even see the keyboard!  I'd better stop so I can finish this up and get back to cleaning & packing!:)

So anyway, this is a cookie that Kyla and I came up with when we went on that whoopie pie kick a few months ago.   Remember THESE?  They were part of that kick as well!:) 

These are delicious!  Especially if you're a lemon lover, like myself.

Lemon Poppyseed Whoopie Pies
1 box lemon cake mix
2 eggs
1/3 cup oil
1 Tablespoons poppy seeds
1 teaspoon almond extract

Frosting (for filling):
1/2 cup butter, softened
3-4 cups powdered sugar
1/4 cup fresh lemon juice
1/2 teaspoon lemon zest

Mix cake mix, eggs, and oil together in a mixer.  Batter will be sticky.  Add the poppy seeds and extract and mix to combine.  Scoop dough onto cookie sheet and bake at 350 degrees for 7-9 minutes.  Remove and let sit on pan for about 3 minutes and then transfer to a wire rack to cool completely.

When cookies have cooled, mix up your frosting.  Beat the butter until light and fluffy.  Add the powdered sugar and lemon juice until you get the desired consistency.  Add the lemon zest and mix to combine. 

Place half the cookie upside down and pipe (or spread with a knife) frosting on.  Cover with the other cookie to make your cookie sandwich. 

LOVE!:)

Tuesday, December 20, 2011

Cranberry White Chocolate Chip Cookies

I've never been a big fan of raisins.  They have never been wanted in any of my baked goods (EXCEPT this one...I really like them in this!)...not in my cinnamon rolls, cookies, breads, etc. 

Craisins on the other hand, I love!  And what was the obvious choice to bake them in?  Cookies!  These were delicious.  I love the combination of the tart craisins with the sweet cookie and white chocolate.  And they look so festive for Christmas time.  I'm sure some neighbors would love to get a batch of these!

If you're a slacker like me, you haven't gotten around to giving any neighbor gifts yet.  And come to think of it, I have no idea when I would even fit it in this week.  So, I believe I'm going to be giving neighborhood New Year's treats instead this year...do you think this will be frowned upon??

Cranberry White Chocolate Chip Cookies
Recipe from Dulce Dough
Pin It
1/2 cup butter, softened
1/2 cup sugar
1/2 cup brown sugar, packed
1 egg
1 1/2 teaspoons vanilla
1 1/2 cups flour
1/2 teaspoon baking soda
1 cup dried cranberries (craisins)
1 cup white chocolate chips

In a large bowl cream together the butter and sugars.  Beat in the eggs and vanilla.

Combine the flour and baking soda and then gradually add it to the butter mixture and mix well.  Now fold in the dried cranberries and baking chips. 

Using a medium sized cookie scoop, put dough onto an ungreased baking sheet.  Bake at 375°F for 8 - 10 minutes or until cookies are lightly browned.

Allow cookies to cool on the baking sheet for about 1 minute, then remove from pan to a wire rack and allow to cool completely.

Wednesday, November 16, 2011

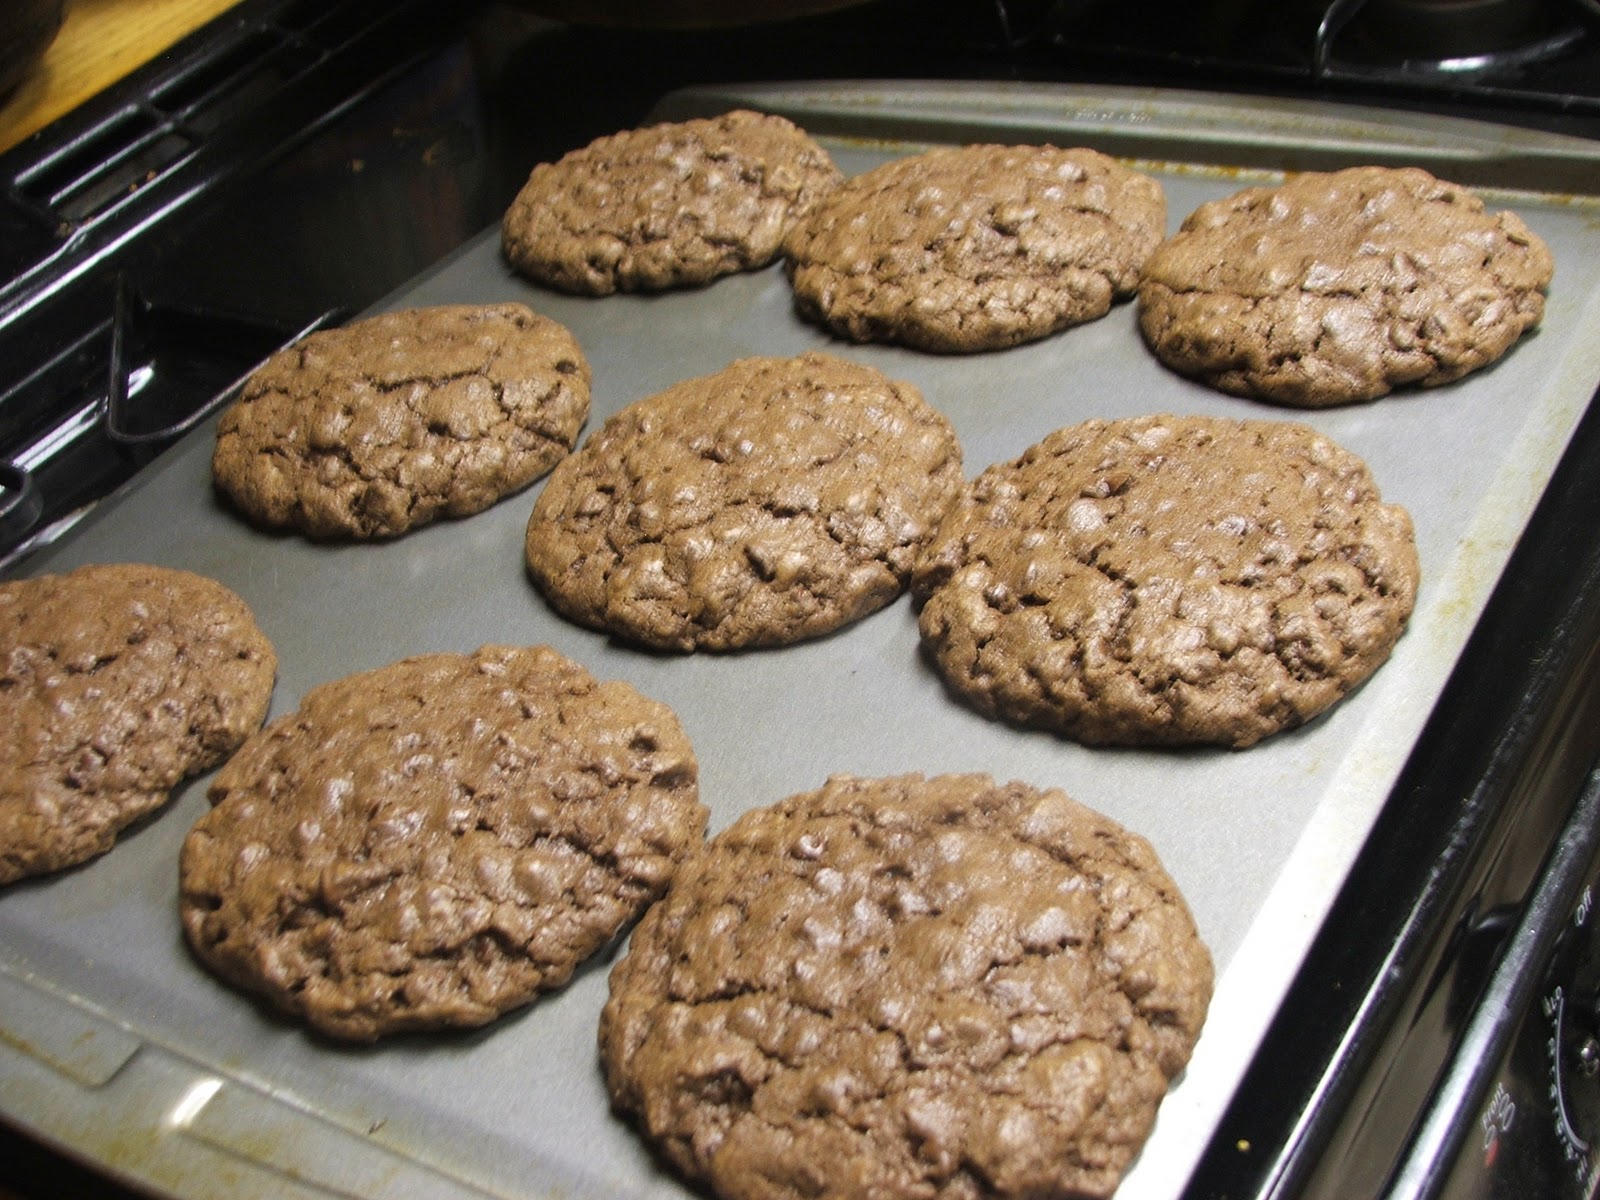
Giant Double Chocolate Cookies


I saw these bad boys on Pinterest last week and knew they had to made SOON!  By the way, if you have not yet been to Pinterest or don't know what in the heck it is...you need to go and check it out NOW!  I love that whenever I find something that I know is going to change my life (ie...these cookies!) I can just "pin" it and it's there for future use...brilliant!  It so blows my 127 pages of recipes in a word document out of the water!!  Not that I think I'll ever be able to keep up with it either, but it is just so much more manageable!  (Also, you can follow my pin's over on pinterest by clicking the "Follow me on Pinterest" button on the right side bar...can't wait to see you all there!) 

In the meantime you need to make these cookies!  Usually when I make cookies I keep going back for more and end up eating 3, or 4, ok maybe 10.  But one of these cookies did it for me.  It makes me feel good that I just ate 1...talk about self control!:)  Ok, it may be because each cookie is 4 oz. of dough, that it's so rich and chocolatey and gooey, and that the recipe made just enough for all of our party to only have 1, but I like to think it's because I had some self control.  And you'll definately want a glass of milk with this one! 


Giant Double Chocolate Cookies
Recipe from Annie's Eats

1 cup cold, unsalted butter, cubed
1 1/4 cup sugar
2 large eggs
1/2 cup cocoa powder (regular or dark...I used regular, but can't wait to try the dark!)
2 1/4 cups flour
1/4 teaspoon coarse salt
1 teaspoon baking powder
1 cup milk chocolate chips
1 cup semi-sweet chocolate chips (I used the mini's!)

Preheat oven to 350 degrees.  You can line your cookie sheet with parchment paper or silicone baking mats (silpat), but I just cooked mine right on the cookie sheet. 

In the bowl of an electric mixer, combine the butter and sugar.  Beat together on medium-high speed until light and fluffy, about 2-3 minutes.  Blend in the eggs one at a time.  Mix in the cocoa powder until well blended.  Add the flour, salt and baking powder to the bowl and mix on low speed just until incorporated.  Fold in the chcoolate chips.  Transfer the dough to a work surface and knead briefly by hand to make sure all the ingredients are well combined.  (Try to refrain from eating any dough or you'll only end up with 11 cookies instead of 12...we know this from personal experience, good thing we only needed 11!!)


Divide the dough into 4 ounce portions.  I used my kitchen scale.  If you don't have one, this would be the perfect excuse to go and get one...or...I figured each cookie was about 6 tablespoons of dough, so you can guesstimate that way too!:)  Roll each portion of dough into a ball and flatten just slightly into a disc.  Place on the cookie sheets a few inches apart.  Bake for 16-20 minutes.  Let the cookies cool on the pan for 5-10 minutes and then you can transfer them to a wire rack to cool completely or you can serve them and eat them warm, which is what we did!  De.lic.ious.

Monday, November 7, 2011

Pumpkin Chocolate Chip Whoopie Pies

There are times in my life when I just have this overwhelming love for people.  This weekend has been one of those times.  People are GOOD!  I witnessed so much good this weekend and I love being reminded that although there are some real pieces of work out there, that there are also really, REALLY good people out there too!  It makes me want to make something for everyone!  Cause that's how I show my love and thanks...I bake!:)  These cookies (in my humble opinion) would more than adequately say "thanks" and "love you".  You will have new best friends!  Give it a try.  Make a batch for someone!

Pumpkin Chocolate Chip Whoopie Pies
Recipe from Your Cup of Cake
Pumpkin Chocolate Chip Cake Cookies:

1 box spice cake mix
1 ½ teaspoons pumpkin pie spice
15 oz pumpkin puree
1/3 cup applesauce
1 bag mini chocolate chips

Cream Cheese Filling:
8 oz cream cheese
¼ cup butter, softened
2 ½ cup powdered sugar
1 teaspoon vanilla
½ teaspoon cinnamon

Directions:
Preheat oven to 350 degrees and line cookie sheets with parchment paper, or silpat.  Mix spice cake mix and pumpkin pie spice together then add the pumpkin and applesauce and mix until combined.  Mix in the chocolate chips.   Scoop dough using a medium cookie scoop (or spoons...just make the dough about golf ball size) onto parchment paper/silpat and bake for 11-14 minutes or until the tops are cooked. Place onto cooling racks, and make sure they are completely cooled before assembling.

For the filling, beat the cream cheese and butter until smooth. Add the powdered sugar, vanilla and cinnamon and beat for 2-3 minutes.

Assemble cookie sandwiches by piping filling into the bottom side of half the cookies.  Place another cookie on top and then refrigerate cookies until chilled, about 1 hour. This will help so that all the filling does not gush out over the sides when you're trying to eat them!

You'll make some friends for life!:)

Monday, October 24, 2011

Chocolate & Peanut Butter Whoopie Pies

I have been addicted to whoopie pies lately and this one I made up all by myself, which I am proud of.  This is ssssssssssooooooooooo yummy!   
-Kyla

There's a girl of not many words!:)  And I had to make so many spelling corrections...that girl CANNOT spell worth beans, but we love her anyway!  And she's right, she came up with this one after I had tried a new concoction as well (we'll post that one too cause it was super yummy as well!).  This one was my favorite of the 2 though...that's another fact that Kyla is very proud of!:)

Chocolate & Peanut Butter Whoopie Pies

1 box chocolate cake mix (We used triple chocolate, but any would work)
2 eggs
1/3 cup oil
1/2 cup peanut butter chips

Mix cake mix, eggs, and oil in a mixer.  It will be thick and sticky...you did it right!:)  Add the peanut butter chips and mix until incorporated.  Scoop with a medium cookie scoop (win one here) onto a cookie sheet lined with a silpat or parchment paper (win a silpat here, too!) and cook for 7-9 minutes.  Let cool on pan for about 3 minutes and then transfer to a cooling rack until completely cooled. 

Frosting:
1/2 cup creamy peanut butter
1/2 cup butter, at room temperature
2 tsp vanilla extract
2 cups powdered sugar

Cream together the butter and peanut butter. Add the vanilla, then the sugar. Beat until fluffy.

Assembly:
Place all the cookies upside down and pipe the frosting (or you could just spread it) onto half of the cookies.  Place the other cookie on top and you've got yourself a Whoopie Pie!!  And a really good one at that!!:)
ENJOY!!

Tuesday, October 4, 2011

Soft & Chewy Peanut Butter Cookies

It's hard to find a good Peanut Butter Cookie recipe!  I can't stand a hard crunchy PB cookie...they need to be soft and chewy (and stay that way)!  Well, if you have the same inclination as me & my family towards PB cookies...this is the recipe for YOU!!  These stayed so soft & chewy (well, at least for the 24 hours they were around!:)) and were absolutely wonderful!

Soft & Chewy Peanut Butter Cookies

1/2 cup butter, softened
1 cup peanut butter
3/4 cup white sugar
1/2 cup firmly packed brown sugar
1 egg
1 tablespoon milk
1 teaspoon vanilla
1 1/4 cup flour
3/4 teaspoon baking soda
1/2 teaspoon baking powder
1/4 teaspoon salt

Beat together the butter & peanut butter until well combined.  Add sugars and beat until fluffy.  Add the egg, milk, and vanilla and mix until smooth.  Add flour, baking soda, baking powder, and salt and mix just until blended.

Get a small bowl filled with sugar.  Using a cookie scoop, (or you can use your hand and roll out balls, but the cookie scoop is just so much easier!) scoop out balls of dough into the bowl of sugar and roll them around until the entire cookie is covered.  Place on an ungreased cookie sheet.  Bake at 350 degrees for 10-12 minutes.  Do not over bake!!  Let the cookies cool on baking sheet for about 3 minutes then transfer to a wire rack to cool completely.  Store in an airtight container at room temperature.

Makes about 3 dozen

Wednesday, June 29, 2011

Laura's Pumpkin Chocolate Chip Cookies

This recipe is so stinkin' good.  Tony (the hubby) first tried these when one of his 2nd grade students brought a plate full of them to class for him one day...many years ago (that student is now heading into High School!)  They were an instant favorite of his & so I had to make a phone call to get the recipe.  We've been making them more often than we probably should since then!  The best pumpkin cookies out there!!  Thanks Laura!:)

Laura's Pumpkin Chocolate Chip Cookies
1 cup sugar
1/2 cup oil
1 teaspoon milk
1 can (15 oz.) pumpkin
1 egg
1 teaspoon vanilla
1 teaspoon baking soda
2 teaspoons baking powder
1 teaspoon cinnamon
1 bag chocolate chips (semi-sweet or milk chocolate...Tony likes the milk chocolate best!)
2 cups flour

Mix sugar, oil, milk, pumpkin, egg and vanilla together.  Add the dry ingredients and mix until combined.  Add the chocolate chips a mix in.  Place on baking sheet using a cookie scoop or 2 spoons, about 1 tablespoon of dough.  Bake at 350 degrees for 15 minutes.

These are enjoyed year round in our home! YUMMY!!

Friday, May 20, 2011

Brownie Chunk & Chocolate Chip Cookies

I've been putting off doing any baking since I don't have a mixer to make anything with!!  But I just couldn't wait until Tuesday (the day my replacement bowl is supposed to be here!) to try these out!!  So I psyched myself out & went for it the "old fashined way"!!:)  I can now tell you...I don't know how I ever lived without my mixer!!  There are only 2 positive things I can say...at least I got a workout & burned a few of the calories that I would consume later when the cookies were finished!:)  And #2...the cookies were fabulous...even without the mixer!! (Although I know they'd be just as fabulous WITH a mixer!!)

Brownie Chunk & Chocolate Chip Cookies
Recipe from Picky Palate
1 cup (2 sticks) unsalted butter, softened
3/4 cup granulated sugar
3/4 cup packed light brown sugar
2 large eggs
1 tablespoon vanilla
3 cups flour
1 teaspoon baking soda
1/2 teaspoon kosher salt
1 cup chocolate chips
2 cups cubed prepared brownies (I just used a boxed brownie mix...2 cups was about 1/3 of a 9 x 13 pan.  I'm certain you could use any brownie recipe for this!)

Preheat oven to 350 degrees.

Cream butter & sugars until light & fluffy.  (I used my electric hand mixer that I received for my wedding that hadn't been used in YEARS!)  Add the eggs and vanilla and beat until well combined.

Place the flour, baking soda, and salt into a large bowl, mixing to combine.  I gotta be honest...I usually always skip this step because I know my bosch will mix it in fabulously, but since I didn't have a bosch to use I went ahead and did this step.  Slowly add dry ingredients to wet ingredients and mix until combined.  Add the chocolate chips & brownie chunks and stir until just combined.  I just used a wooden spoon for this step...hence the great workout I got!!:) 

Use a medium scoop and scoop dough onto a greased baking sheet.  Bake for 9-11 minutes.  Let cool for 5 minutes before removing to a cooling rack.

Makes about 3 dozen cookies

Pour yourself a glass of milk & enjoy the best of 2 worlds...brownies & cookies!!
Related Posts Plugin for WordPress, Blogger...