Showing posts with label Breads and Rolls. Show all posts

Monday, June 10, 2013

Navajo Tacos with Homemade Scones

This is a recipe that is requested often at our home and is a staple for whenever we have company over.  We served these last night and had a young man who had never had them before...he's from Louisiana, so he knows all about beignets (which is pretty much the same thing as a scone).  And so, instead of piling all the ingredients on top of the scones he opened up the top and stuffed them full...gotta say, it looked pretty delicious that way!  And I think he probably ate 4 of them!:)

Don't let the homemade scones scare you off.   They are really easy to make & are delicious!  This recipe makes a lot, but they are great leftovers and can also be frozen after they are fried and taste just as good warmed up.  My family likes to make some smaller sized ones and toss them in a bag with some powdered sugar, or slather them with honey butter.  They are also good with jam and are to DIE FOR with a little nutella spread on top!

Navajo Tacos with Homemade Scones
PRINT RECIPE


Scones:
2 tablespoons yeast
1/2 cup warm water
1/2 cup butter or margarine, softened
1 teaspoon salt
1/4 cup sugar
2 cups warm water
2 eggs
7-8 cups flour

For Navajo Tacos:
Scones
Chili ( Heres a great homemade recipe, or canned)
shredded cheddar cheese
lettuce
sour cream
sliced tomatoes
sliced olives

To make the scones:
Dissolve the yeast in the 1/2 cup of warm water.  While yeast is "growing", combine the butter, salt, sugar, water, eggs and 4 cups of the flour.  Mix in blender using the whisking beaters until smooth.  Change out the beaters for your dough arm and add the remaining flour until a soft, slightly sticky dough forms.  I gauge this by when the dough "cleans" the sides of my bosch.

You can put the dough in the fridge at this point if you are making it a head of time and just pull it out a half hour to 45 minutes before you are ready to fry them, or you can just start rolling them out and frying them right away.

Divide the dough in half and spray counter/rolling area with cooking spray (I think this works better than flouring your surface and it's a lot easier to clean up!) and roll dough until it is about 1/2 inch thick.  Use a pizza cutter to cut the dough into horizontal strips about 3" across and then do the same vertically.

Fry them in 350 degree oil until browned on both sides.  Watch them carefully...they brown quickly!  Transfer to a paper towel lined plate.

To assemble your Navajo taco:
Place scone(s) on bottom of plate.  Ladle hot chili on top of scones.  Top with cheese, lettuce, tomatoes, sour cream and olives.

Dig in!

Tuesday, March 26, 2013

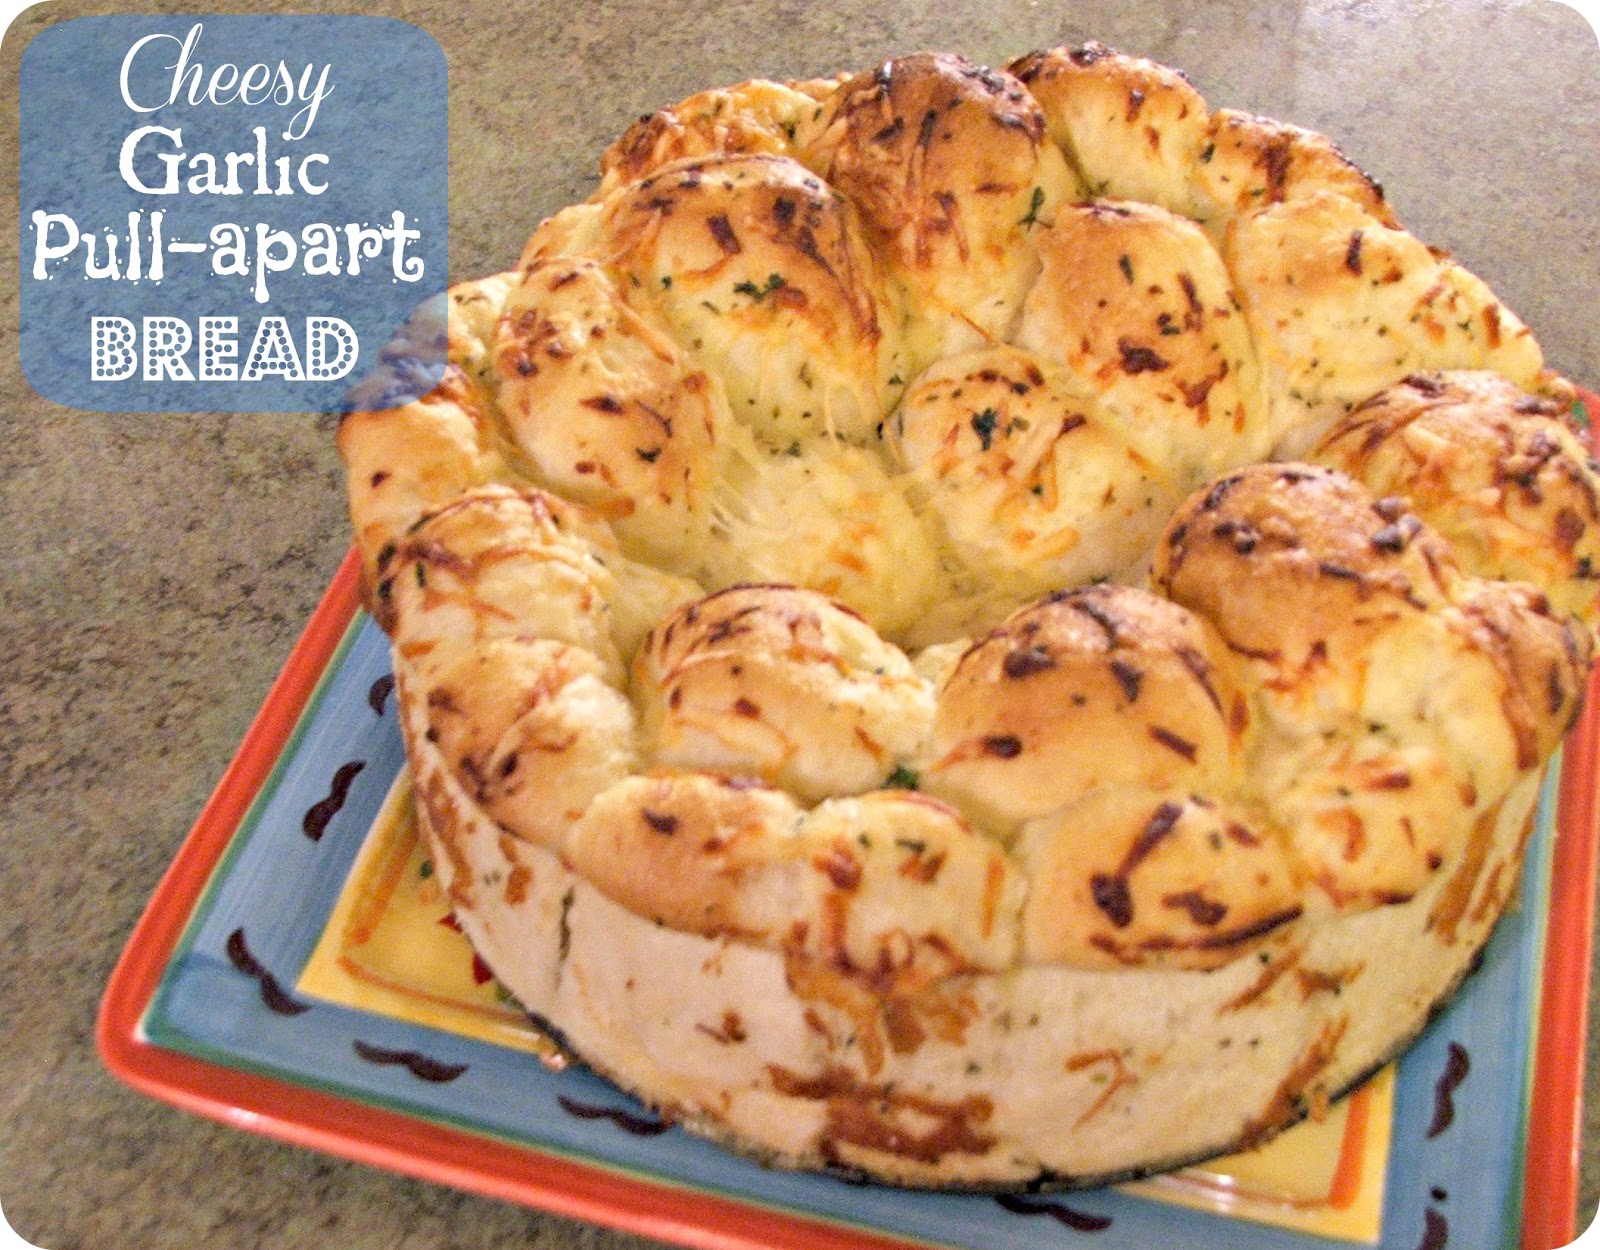
Cheesy Garlic Pull-apart Bread

I've been on a diet (It's called the Dukan diet, cause I know someone will ask!) for a month and
1 day now, but who's counting?  And all this food yummy delicious food I've been posting lately is making me slobber all over my keyboard!  It's basically a no carb diet (DYING!!!) but it's working, so it's worth it to me.  I'm feeling so much better about me & that's the biggest perk!

It's a good thing I didn't make these during this diet time, cause I don't know if I'd be able to resist pulling one of these off and watching all that stringy cheesy goodness and not stuff my face with half of them.  It would just be too much!   


Cheesy Garlic Pull-apart Bread
 

16 frozen Rhodes white dinner rolls
1/2 cup butter, melted
1/2 cup grated mozzarella cheese
1 teaspoon dry parsley flakes
2 garlic cloves, pressed
1/2 teaspoon Italian seasoning
1/4 teaspoon onion powder
1/2 cup grated Parmesan cheese

Take rolls out of the freezer and place in a greased pan.  Cover with plastic wrap that has been sprayed with  cooking spray to prevent sticking.  Let dough sit for 45 minutes to 1 hour.  Next, use some clean scissors to cut each roll in half.


Melt butter in a large microwaveable dish.  Add the parsley, garlic, salt, Italian seasoning and onion powder. Stir to combine, then add the mozzarella cheese.  Now, throw in all your dough halves and using your hand move dough around until it is all evenly coated.


Line the bottom of a 9 inch spring form pan with dough pieces.  Cover with the Parmesan cheese.


Cover dough with same sprayed plastic wrap you used in the beginning.  Let raise for 1 1/2 - 2 hours or until it looks like this:


Place spring form pan on a cookie sheet to prevent the buttery goodness from leaking all over in your oven and making a terribly mess!  Bake at 350 degrees for 20-25 minutes or until browned and the center is cooked through.

Remove the sides of the spring form pan and just pull sections off & devour!  Ours was gone in 5 minutes flat!!

Monday, February 25, 2013

Cheesy Jalapeno Bread

I grew up in a small town where we had a Maverik gas station.  It was the happenin' place!  (Yes, I know it's a gas station...we hicks had to have something to do!:))  I've never been a big soda drinker, so when everyone else went to get their soda fix, I was buying their cheesy bread.  It wasn't until I married my husband, who likes all things spicy, that I started to appreciate the jalapenos.  I'm still a wimp, but I love the taste, so I go for it!

We moved away from home 10 years ago and guess what?  No Maveriks around anymore...until about a month ago.  YES...we now have a Maverik in our home town!  (You wouldn't believe the excitement that a new gas station has caused...I guess we're a bunch of hicks here too!:))  Anyway, I was reminded of this bread again after my 5 year old begged for about a week to go to "the Maverik".  He was in heaven...he wanted to try everything, but settled for an orange slushie.  I of course got some cheesy jalapeno bread.  It wasn't as good as I remembered it, so I decided I'd make my own.

Now this recipe is a lot like how I remember the stuff...soft & cheesy!

Cheesy Jalapeno Bread


For the bread: (makes 2 loaves)
1 1/2 cups warm water
1 tablespoon yeast
1 tablespoon sugar
3-4 cups flour

Toppings:
2 tablespoons olive oil
1 teaspoon garlic powder
1/4 cup Parmesan cheese (powder stuff)
1 cup grated mozzarella cheese
1/4 cup grated cheddar cheese
1 teaspoon Italian seasoning
banana peppers
jalapeno peppers

Place warm water, yeast and sugar in a mixer.  Let sit for about 10 minutes or until yeast is bubbly.  Add 2 cups of flour and mix until smooth.  Add remaining flour until dough comes together.  It should be soft and just a little sticky to touch.

Take half of the dough and roll it out into an oval about 1/4 inch thick.  This by no means needs to be perfect!  Transfer to a greased cookie sheet.


Spread half of the olive oil onto bread, just enough to lightly coat the bread using the back of a spoon.


Sprinkle half of the garlic & Parmesan cheese over the oil.


Now take half of the mozzarella and spread over the garlic/Parmesan mixture.  Top with your pick of banana peppers or jalapenos.  We like both!  And I like to use the "tamed" jalapenos which still have a kick to them I think, but if you like the heat go for the regular ones!  


Now sprinkle the cheddar cheese over the peppers and then the Italian seasoning over that.


Bake at 425 degrees for 12-15 minutes or until cheese is melted and bread is starting to brown.

Cut into strips using a pizza cutter & dig in!  We also like to just rip pieces off when it's cooled just a little...oooohhhh mmmmmm!!:)

This recipe makes 2 loaves, so start the whole process over with the other half!  They are also scrumptious with olives on them!  Just FYI.

Monday, December 10, 2012

Cranberry Eggnog Braid

Who loves eggnog?  I do!!  But I can only drink it during Thanksgiving/Christmas time (good thing that's the only time they sell it!:)) & I can only have 1 glass.  Too much of it makes me dizzy!:)  Sugar rush or something.  Although I can't drink it straight.  I dilute it about 50/50 with skim milk.  It's just too thick otherwise & kind of activates my gag reflex.  My husband likes to add Sprite to his eggnog.  I don't personally like it, but to each their own!  

What's your method of drinking eggnog?  Love it?  Hate it?  What do you like to add to yours, if anything?  I'm really curious about everyone elses eggnog drinking habits.:)

If you love (or even just like) eggnog, I think you'll really enjoy this treat!  I love doing fun things with my bread...like braiding it!  Looks so pretty & yummy!  

Make this sweet treat for your eggnog lovin' friends!

Cranberry Eggnog Briad

1 tablespoon yeast
1/4 cup warm water
1/4 cup sugar
1/2 teaspoon salt
1/2 teaspoon nutmeg
1 1/4 cups eggnog, scalded
1/4 cup oil
3 - 3 1/2 cups flour
1/2 cup craisins
Glaze:
3/4 cup powdered sugar
2 tablespoons eggnog
1/2 teaspoon vanilla
dash of nutmeg

Dissolve the yeast in the warm water in your mixer.  Let sit for about 10 minutes.  While the yeast is sitting, place eggnog in microwave for about 2-3 minutes.  You just want to scald it...heat it to just before boiling point.  Let eggnog cool until 10 minutes is up.  Add the sugar, salt, nutmeg, eggnog, oil and 1 1/2 cups of the flour to your yeast mixture.  Beat together until smooth.  Add craisins and enough flour to make a soft dough.  Let knead in your mixer for about 5-8 minutes.

Spray a large bowl with cooking spray and place dough in bowl.  Cover and let sit in a warm place for 20-30 minutes.


Divide dough into 2 equal parts.  Place one half on surface that has been sprayed with cooking spray (lot less messy than a floured surface & works great!)  Divide that half into 3 equal parts.  It doesn't have to be exact, just eyeball it.


Using your hand, roll each ball into a 16" or so long "rope".


Press the top of the tree "ropes" together to start.


Then just start braiding your 3 ropes together.


When you get to the end of your ropes (funny!:)), just tuck the bottom ends underneath a little and pinch dough together.  Place on a greased cookie sheet.  Cover and let raise for about 45 minutes to 1 hour or until doubled in size.


Bake at 350 degrees for 20-25 minutes or until they are lightly browned.  Let cool.

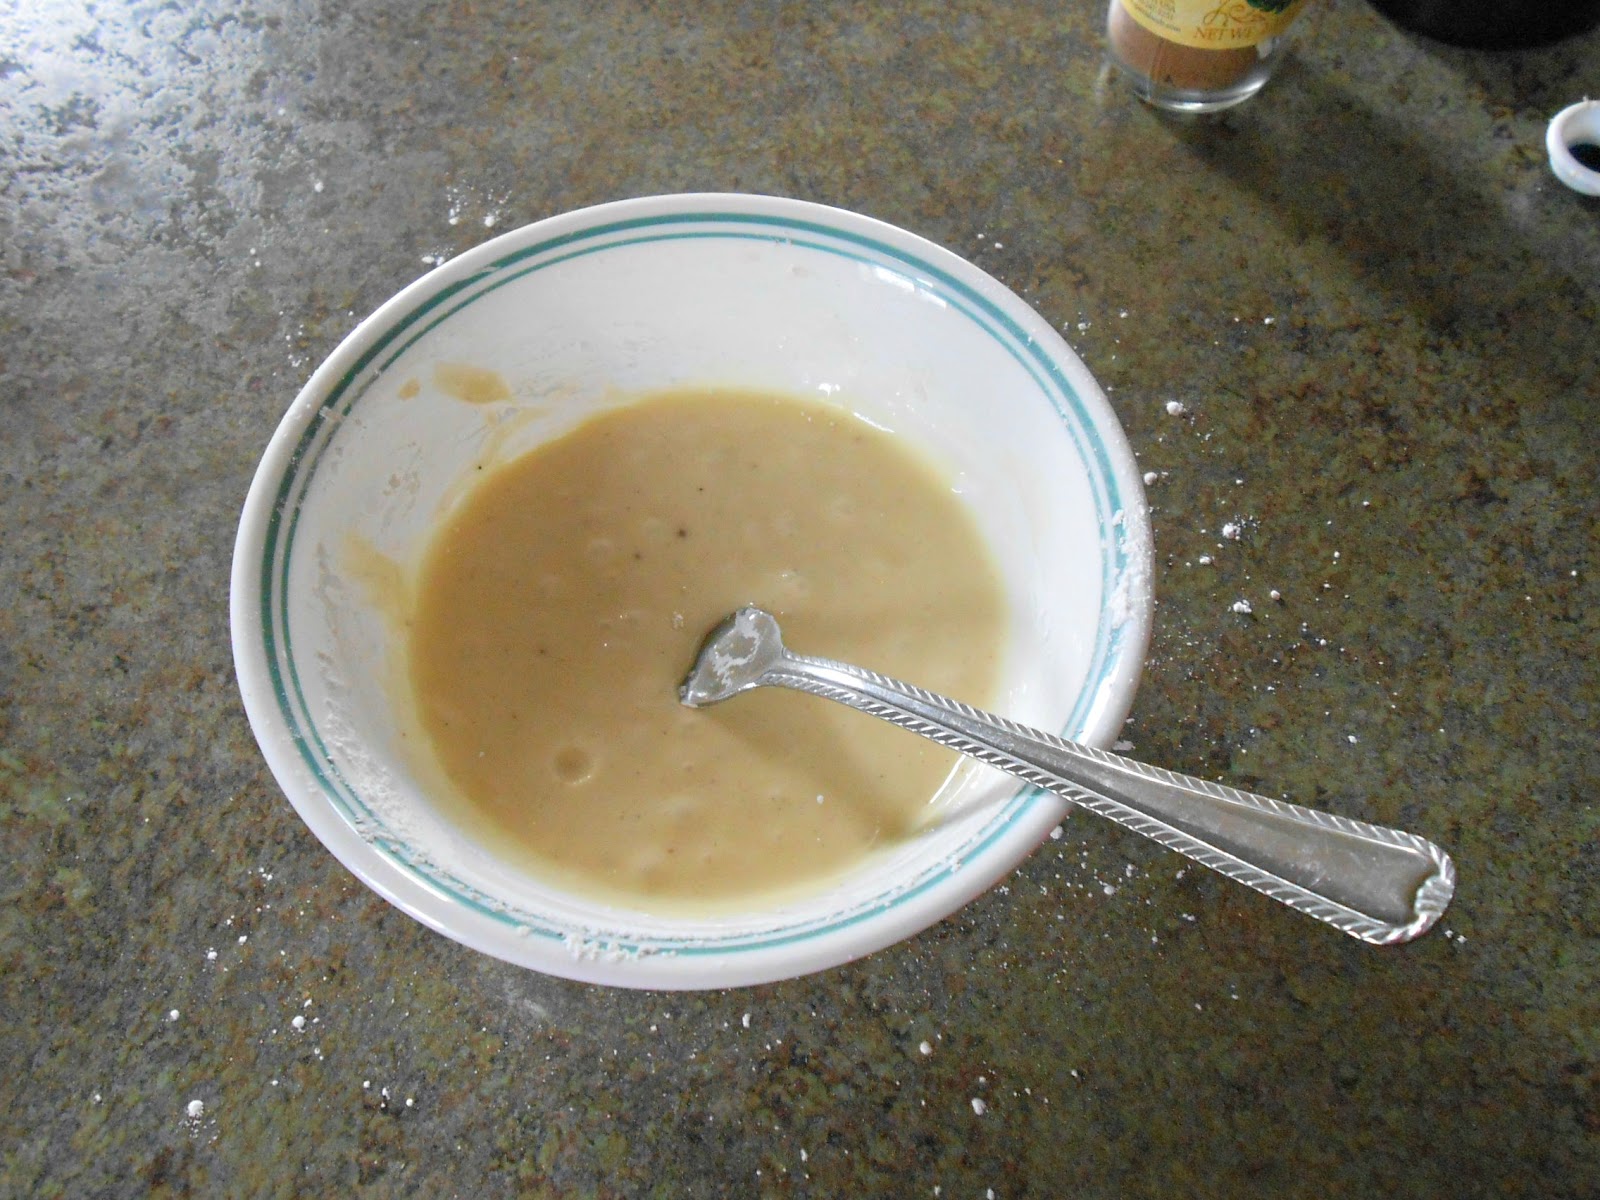
For the glaze, combine all ingredients in a small bowl and whisk with a fork until smooth.


Place cooled braids on wax paper.  Using your fork, drizzle glaze over braids.


Wah-lah!!  Isn't it beautiful?  

You could wrap them up nice and give them as Christmas treats to neighbors & friends!  They will love you!


Friday, October 19, 2012

Cheesy Garlic Pull-Apart Bread (Guest Post at Or So She Says)

With all the soups we've been making lately, I wanted to try out a new recipe for a yummy bread to go with it.  And I found the perfect one that the family scarfed down in no time flat!

Serve it with one of our 6 favorite soups or any of these other soups from our index!


You can find the recipe over at Or So She Says today.  Stop by and give us some love!:)

Tuesday, August 21, 2012

Lemon & Orange Pull Apart Bread

Dropped my baby off at his first day of Kindergarten this morning.

So...to deal I figured I'd better bake something.

Baking is my emotional heal-all coping mechanism.  The end product is just a bonus!  And this recipe combines some of my favorite things.  Lemon, orange, cream cheese, and bread!!  How could it go wrong?

It didn't!! 

But I did miss my little helper.  I kept hearing him in my mind: "Mom can I put that in?" " Mom can I lick that?" "Mom I love you so much you are the best Mom in the world & you make me the most wonderful things!"  (Ok, that last one was just a figment of my imagination...just dreamin'):)

Anyway, these are awesome gooey yumminess.  There may not be any left for the kids for after school, but what they don't know won't hurt them right??:)

Another bonus: all the baking, taking pictures, and blogging has keep this little Momma occupied so I don't go curl up in my closet and cry! 

Can't wait to see how his 1st day of Kindergarten went!!

Lemon & Orange Pull Apart Bread
Dough:
2 1/2-3 cups flour
1/4 cup sugar
2 tablespoons yeast
1/3 cup whole milk
1/4 cup butter
1/4 cup water
1 1/2 teaspoons vanilla
2 large eggs

Lemon Orange Sugar Filling:
1/2 cup sugar
zest from 3 lemons
zest from 1 orange
4 Tablespoons butter, melted

Cream Cheese Glaze:
3 ounces cream cheese, softened
1/3 cup powdered sugar
1 tablespoon whole milk
1 1/2 tablespoons fresh lemon juice

Mix 2 1/2 cups flour, sugar, and salt in a bowl; set aside.

Heat the milk and butter in the microwave for about 1 minutes or until the butter is melted.   Pour into mixer and allow it to cool a little (about 5 minutes).  Add the yeast, water and vanilla and mix to combine. Let sit for 10 minutes.  Add eggs and half of the flour mixture and beat until smooth.  Add the remaining flour and mix.  Add more flour if needed.  The dough should be sticky, but smooth.  Place dough in a bowl that has been sprayed with cooking spray.  Cover with a towel and let raise until double, about 45 minutes.

It should look like this after it has raised.


Mix the sugar with the lemon and orange zest.  This is my absolute favorite part...it smells so good I have a hard time not just eating the zest!!:)


Grease a 9" x 5" loaf pan with cooking spray.  Set aside.

Flour your surface and begin rolling out your dough into a rectangle.  It needs to be quite thin & approximately 20" by 12".  A ruler is a good help in this step if you're anything like me!


Melt the butter and pour over dough.  Using the back of a spoon or a pastry brush smooth the butter over the entire surface of the dough.


Using a pizza cutter, cut the dough into 12" by 4" strips, like shown.  As you can tell they are not exact...just try to keep them about the same. 


Place 1/5th of the sugar/zest mixture on one of the strips of dough.  Using your finger (yes this is a little messy, but your fingers work the best!) spread the zest all over the strip of dough. 

Stack the next strip on top of the zest covered one and put another 1/5th of zest on top and smooth out with your fingers.


Keep going until you have all 5 strips staked on top of each other.


Now take your knife and cut the stack into 2" sections, and place into greased loaf pan with the cut side up.


There will be 6 (or 7, depending on how accurate your rectangle was to begin with...mine was 7:)) stacks altogether.  Just keep stacking them into the loaf pan until it looks like this.


Cover lightly with saran wrap and let raise again for about 30 minutes or until about doubled in bulk.  Here's how it will look when it goes in the oven...YUMMY!!


Top view without the saran wrap...Oh My!


While it's raising, go ahead and preheat your oven to 350 degrees.
Bake for 20 minutes and then pull it out of the oven.  It is not done yet, but should be getting pretty browned on the top, as shown here...


Cover it loosely with tinfoil and put it back in the oven to cook for another 10-15 minutes.  This will help it from getting too browned (or black)!!


While it is baking the last few minutes, whip up the cream cheese icing.   In a small bowl combine the cream cheese and powdered sugar and mix together until smooth.  Just keep smashing the cream cheese with the back of a wooden spoon.  Add the lemon juice and milk and stir until smooth.  If you have a few small lumps don't worry too much about it...it will look fabulous on the bread!


Pour over the bread and smooth it all over while the bread is still hot. 

Let sit in pan for 10 minutes and then you can dig in!  Delicious!

Related Posts Plugin for WordPress, Blogger...