Thursday, November 15, 2012

Pecan Brownie Pie

This recipe first caught my eye because it was named "Kentucky Pie"!  Half of my heart is in Kentucky, so I thought I'd give it a try.  (My Mom's side of the family is from Kentucky and I'd spend weeks at a time during the summer there growing up!)    Then...I looked at the ingredients and saw that it had both chocolate and pecans in it and I knew right then it would be a winner!

Well, turns out it's pretty much a brownie in a pie crust...how cool is that!  You just serve this warm with some vanilla ice cream drizzled with hot fudge and topped with pecans and you've got a dessert that will leave you happy!:)

Pecan Brownie Pie


1 teaspoon vanilla
1/2 cup butter, melted
1/2 cup sifted self-rising flour
1 cup semi-sweet chocolate chips
1 cup sugar
2 eggs, lightly beaten
1 cup choppe pecans
1 deep dish 9 inch unbaked pie shell

Preheat oven to 350 degrees.

Lightly beat eggs in a large bowl.  Add the sugar and combine.


 Pour melted chocolate into egg/sugar mixture and stir to combine.


  Add the flour and mix well, then add the vanilla and butter and mix until combined.


 Mix in pecans.


Pour into an unbaked pie shell.


Bake 50-60 minutes.

Serve warm with ice cream, hot fudge and additional pecans.

Thanks for checkin' out Pie #4 of our Pie week!  Just in case you missed them, here's Pie #1, Pie #2, and Pie #3!  Or check out our Pies section for more pie ideas!


Wednesday, November 14, 2012

Blueberry Banana Chiffon Pie

I know what you're thinking...Blueberries & banana's...together...on a pie???  

Get over it!:) 
(was that a little harsh?  Sorry!)

 This is one of the best combinations ever!  Do not scrunch your nose up until you try it.  I can not stress this enough....just trust me, this needs to be made SOON!  (And Thanksgiving is right around the corner!)  The chiffon layers have a mousse-like tecture that is out of this world amazing! 

 Your family will thank you for this one...guaranteed!

Blueberry Banana Chiffon Pie
 
6 ounces cream cheese, softened
1 can (14 oz.) sweetened condensed milk
3/4 cup cold water
1 package (3.4 oz.) instant vanilla pudding
2 cups heavy whipping cream, divided
1/4 cup powdered sugar
2 medium sized bananas, cut into 1/4th inch slices
1 cup fresh blueberries
1 prepared graham cracker crust (9 oz. size)
additional blueberries for garnish, if desired

In your mixer beat 1 cup of  the whipping cream until stiff peaks form; set aside.

Beat cream cheese in mixer until smooth.  Add the condensed milk and beat until smooth.  


Then mix in the water and vanilla pudding mix.  


Fold in the whipped cream.

Place bananas in a ziploc bag with the lemon juice and toss until bananas are coated.  Drain off excess juice.
Spread half of the cream cheese mixture in the bottom of your graham cracker crust.  Top with bananas and blueberries.  


Spread the remaining cream cheese mixture over the top of the sliced bananas and blueberries. 


 Refrigerate for 3 hours or until set. 

Once set beat the remaining 1 cup of whipping cream until soft peaks form.  Add the 1/4 cup of powdered sugar and then beat until stiff peaks form.  Spread on top of pie. 


And garnish with blueberries. 


Thanks for joining us for day 3 of "We're Thankful for Pie Night"  If you missed Day 1 or Day 2...check them out!


Tuesday, November 13, 2012

Lemon Strata Pie

I tried a Lemon Strata Pie this summer, fell in love and vowed I would re-make it!  Well, I forgot about it until a few weeks ago when I happened to have the chance to try it again.  My love was rekindled and this time I knew I had to make this pie!  And what better time than for Thanksgiving?  It was meant to be.

I've never really liked lemon meringue pie, I'm just not a huge meringue fan, but this pie, OH. MY. HECK!

Instead of meringue you are left with a layer of lemon cheesecake, lemon filling & then freshly whipped cream.                                                                                                                                                                                                                                         

So much better than meringue in my opinion.  It had me at cream cheese, like most things do.:)

Lemon Strata Pie

1 9" pie crust, cooked & cooled

Cheese cake layer:
8 oz. cream cheese, softened
1/2 cup sugar
1 egg
2 tablespoons milk
1 tablespoon freshly squeezed lemon juice
1/2 teaspoon vanilla

Lemon filling layer:
1 cup sugar
2 tablespoons flour
3 tablespoons corn starch
1/4 teaspoon salt
1 1/2 cups water
2 lemons, juiced & zested
2 tablespoons butter
4 egg yolks

Whipped cream topping:
2 cups heavy whipping cream
1/2 cup powdered sugar

Preheat oven to 350 degrees.

For the cheesecake layer, beat the cream cheese until smooth.  Add the sugar and mix well.  Cream together the rest of the ingredients until smooth.  Pour over cooked and cooled pie shell.

Bake for 15 minutes.  Remove from oven and let sit for an hour or two, just until it's settled a little and has cooled most of the way.

For the lemon filling, mix sugar, flour, cornstarch and salt in a medium saucepan.  Stir in the water, lemon juice and lemon zest.  Cook over medium-high heat until mixture comes to a boil, stirring frequently.  Once it has reached a boil, add the butter and whisk until butter is melted and incorporated.  Place egg yolks into a small bowl and beat them.  Gradually whisk in about 1/2 cup of the hot lemon mixture into the yolks.  Whisk the egg yolk mixture back in with the lemon filling mixture.  Bring back to a boil and continue to whisk constantly until thick.  Remove from the heat.

Here's the pie crust with the cheesecake filling in it and the lemon filling in the sauce pan getting ready to be poured over the top!


Slowly pour over the cream cheese layer in your pie crust.  Let sit on the counter until lemon filling has mostly cooled.  Then cover and transfer to the fridge until completely cooled.

Place whipping cream in blender and blend until soft peaks form.  Add the powdered sugar and then continue to beat until stiff peaks form.

Slather on top of the lemon filling and top with a slice of lemon.


And there's pie 2 of our Pie week!  Keep coming back for more wonderful pies!

Monday, November 12, 2012

Blackberry Pie

It's here!!  
Just in case you missed it, "We're Thankful for Pie Night" is an annual tradition that we have had in the family for about 6 or 7 years now.  Instead of waiting until Thanksgiving night when everyone is stuffed with turkey, potatoes & all that yumminess, we have Pie Night the evening before Thanksgiving.  That way you can enjoy pie to your hearts content!  Here's a re-cap of "We're Thankful for Pie Night" 2011 and 2010.


This is my favorite time of the year!  We've got pie on the mind (and in the tummy...someone had to sacrifice and try them all!:)) and are so excited to share these wonderful recipes with everyone!

First up is the very wonderful Blackberry Pie.  I love the sweet & tart taste of this pie.  It is just perfect, especially if you serve it with some vanilla ice cream.  This one will be gone fast.  It's pretty and delicious!

Blackberry Pie


5 packages (6 oz. each) fresh blackberries
1 cup sugar
3 tablespoons corn starch
1 teaspoon lemon juice
1/2 teaspoon grated lemon peel
Pie dough for 2 crusts

Preheat the oven to 400 degrees and place a large cookie sheet on the middle rack.

1.  Wash blackberries and drain excess water.  Place in a large bowl.
2.  Add the lemon juice and lemon zest.
3.  Add the sugar and corn starch.
4.  Toss with a spoon until berries are coated.
5.  Let sit for 20 minutes, stirring occassionally.


6.  Coarsely mash berries with potato masher.
7.  Put an unbaked pie crust on the bottom of a 9 inch pie plate.  Pour the mashed berries into pie shell.


8.  Take your other pie crust & roll it out on your counter.
9.  Using a pizza cutter, cut the dough into strips about 1/2 inch thick.


10.  Lay strips of dough in one direction over top the blackberry filling.
11.  Working in the opposite direction, place dough strip on filling in an over/under pattern.
12.  Continue with all strips until pie is covere.
13.  Trip the excess dough around the edged and make a fluted crust.


Place the pie on the hot cookie sheet in the oven and bake until the filling is bubbling 45 minutes to 1 hour.  Check the pie around 30 minutes and if the crust is browning too quickly you can cover the edges with tin foil and continue to bake.

Let the pie cool before serving.


Really yummy served warm with vanilla ice cream.  You can nuke it in the microwave for a little while if desired.

Friday, November 9, 2012

Creamy Corn Chowder

Can't believe Thanksgiving is only 13 days away!  Hope you liked the couple of Thanksgiving recipes we shared this week (The fabulous Herb Brined Turkey & Not Your Mama's Green Bean Casserole!)

AND...

We are so excited about next week because it will involve PIE...lots of pie!!  We're gearing up for our annual "We're Thankful for Pie Night" and so we're going to have a week full of pies starting Monday.  

CAN NOT WAIT!!

In the meantime...we've got another awesome recipe over at Or So She Says today.
Check out this Creamy Corn Chowder!

See you Monday....for PIE!!!!:)

Thursday, November 8, 2012

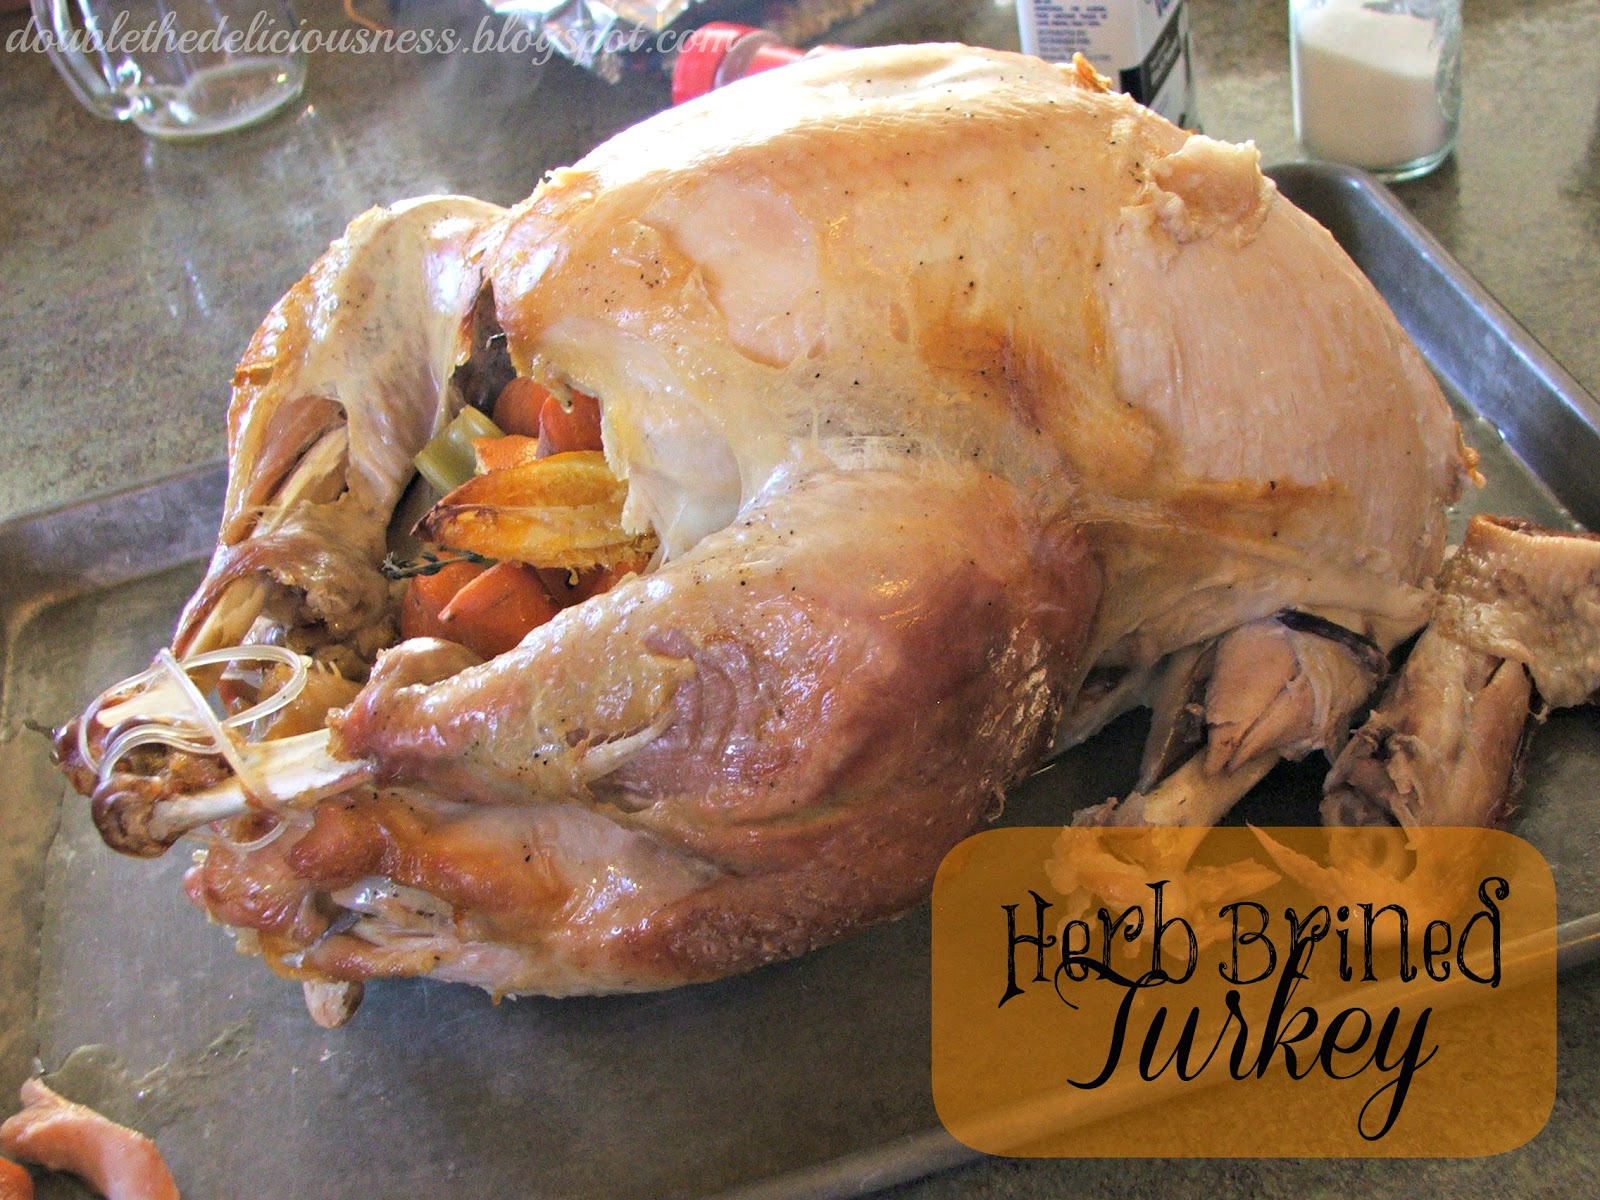
Herb Brined Turkey

Our family had our very first Thanksgiving with just our sweet family a few years back.  It was weird not being with extended family, but we've actually done it a couple of times since then as well & we kind of like it.  Not that we don't love being with family as well, but sometimes it's nice to just have your own traditions & a little less quiet!:)

So, anyway, on that first Thanksgiving by ourselves we decided to try our hand at brining our turkey. 

WE WILL NEVER DO IT ANOTHER WAY NOW!

The turkey was so juicy & flavorful...and the gravy made from the drippings was AMAZING!

This is now our go-to turkey method.  It is really easy since we always use a turkey roasting bag so we don't have to worry about basting.  This bird is fabulous!  Thanks to Emeril Lagasse for the fabulous recipe!

Herb Brined Turkey

  • 1 turkey (10-12 pounds)

  • For the Brine:
  • 1 cup salt
  • 1 cup brown sugar
  • 2 oranges, quartered
  • 2 lemons, quartered
  • 6 sprigs thyme
  • 4 sprigs rosemary
For the inside of the turkey:
1 large orange, cut into 8ths
4 tablespoons unsalted butter at room temperature
salt and pepper
1 large yellow onion, cut into 8ths
1 stalk celery, cut into 1 inch pieces
1 large carrot, cut into 1 inch pieces
2 bay leaves
2 sprigs thyme
2 sprigs rosemary
1/2 bunch sage
3 or 4 sprigs parsley

For the brine:  Dissolve the salt and sugar in 2 gallons of cold water.  I usually use my water bath canner, but you can use a clean bucket or large stockpot or even a heavy-duty food grade plastic storage bag.  Add the oranges, lemons, thyme, and rosemary.

NOTE:  We usually roast the biggest turkey we can find because we love leftovers.  So, if you plan to cook a bird bigger than 12 pounds and need more brine just add an extra 1/2 cup salt and 1/2 cup sugar to every gallon of water.  You just need enough brining solution to cover your bird.

Prepare your turkey by removing the neck, giblets and liver from the cavity of the turkey.  (This is my very least part...I usually make Tony do the honors!)
Rinse the turkey inside and out under cold running water.

Place turkey in the brining solution and cover.  Refrigerate for at least 4 hours and up to 24 hours.  I always start the brine on Thanksgiving eve.

When you are ready to cook your turkey, remove it from the brining solution and rinse under cold running water.  Pat dry with paper towels both inside and out.  Place turkey, breast side up, in a large roasting pan.  Rub the breast with one of the orange segments and rub on all sides with the butter, stuffing some underneath the skin (I actually like this part...I'm a freak I know!)  Season lightly inside and out with salt and pepper.

Place turkey in a turkey roasting bag and then stuff the turkey with the onion, orange, celery, carrot, bay leaves, thyme, rosemary, sage and parsley. 

Follow the baking instructions on the roasting bag.  

If you are inclined to make gravy...PLEASE, please, please don't throw away the drippings at the bottom of your roasting bag!  It makes the most fabulous gravy!

Here's how we make our gravy:

Measure how many cups of drippings you have.  For each cup of drippings you will need 1/4 cup of cold water and 2 Tablespoons of flour.

Heat drippings in saucepan over medium-high heat until boiling.  Mix cold water with the flour.  This needs to be mixed really well so that you don't have clumps in your gravy.  I usually put it in a mason jar and screw a lid on it and let the kids shake the guts out of it!

When boiling, add the water/flour thickening and stir until thickened.  This won't take long.  Pretty dang easy and you've now got  a killer turkey and gravy!!
Don't forget to make some awesome Creamy Mashed Potatoes to go with your gravy!

Monday, November 5, 2012

Not Your Mama's Green Bean Casserole

Not too long before Thanksgiving is upon us, so I figured we'd better get movin' on some good Thanksgiving recipes.

I have never been a fan of the traditional green bean casserole that everyone seems to have with their Thanksgiving dinners, so when I saw this recipe a couple of years ago I knew I needed to try it.  And I'm so glad I did!  IT. IS. DELICIOUS!!!

You will make it year after year after year instead of the mushroom soup/french onion kind out there.  I'm usually a turkey, potatoes and roll kind of Thanksgiving dinner gal, that's all I really need to be happy, but this casserole is now on that list!

Stay tuned this week for my favorite Turkey recipe...and next week you'll be in PIE heaven when we do a week of pies as we gear up for our "We're Thankful for Pie Night"!!  And here's a link to last years "Pie Night"

Not Your Mama's Green Bean Casserole
PRINT RECIPE

Topping:
2 medium onions, thinly sliced
1/4 cup flour
2 tablespoons panko bread crumbs
1 teaspoon kosher salt

Beans:
1 pound fresh green beans, rinsed and trimmed
1 gallon water
2 tablespoons kosher salt

Sauce:
2 tablespoons unsalted butter
12 ounces mushrooms, sliced thinly
1 teaspoon kosher salt
1/2 teaspoon ground pepper
2 cloves garlic, minced
1/4 teaspoon freshly ground nutmeg
2 tablespoons flour
1 cup chicken broth
1 cup half and half

Preheat oven to 475 degrees.

Combine the onions, flour, panko and salt and toss to combine.  Spray a cookie sheet with nonstick spray and spread the onion evenly on the pan.  Bake until golden brown about 30 minutes, tossing every 10 minutes.  When browned, remove and set aside until ready to use.

Turn the oven heat down to 400 degrees.

While the onions are cooking, prepare the beans.  Bring a gallon of water and 2 tablespoons of salt to a boil in a large saucepan.  Blanch for 5 minutes.  Drain the beans and plunge them into a large bowl of ice water to stop them from cooking more.  Drain and set aside.

Melt the butter in a skillet over medium-high heat.  Add the mushrooms, salt and pepper and cook, stirring occasionally, about 4 to 5 minutes.  Add the garlic and nutmeg and cook for another 1-2 minutes.  Sprinkle the flour over the mushroom mixture and stir to combine.  Cook for 1 minute.  Add the broth and simmer for 1 minute.  Add the half-and-half and cook until the mixture thickens, about 6-8 minutes.

Remove from the heat and stir in 1/4 of the onions and all of the green beans.  Top with the remaining onions.  Bake approximately 15 minutes.  Remove and serve immediately.
Related Posts Plugin for WordPress, Blogger...