Monday, May 30, 2011

Peanut Butter Fudge Sauce

This ice cream topping is one of my favorites!!  If you love peanut butter & chocolate this is the one for you!!  It is so super simple to make & can be whipped up in a flash to take that bowl of vanilla ice cream OVER THE TOP!!  Just top with some Reese's chunks or with the new mini reese's cups (they are so stinkin' cute):) and you've got a masterpiece!

Peanut Butter Fudge Sauce
1 cup corn syrup -- light or dark
1 cup creamy peanut butter
1/2 cup heavy cream
1 cup semisweet chocolate chips

In a 2-quart microwaveable bowl combine corn syrup, peanut butter, and cream. Microwave on HIGH for about 1 1/2 minutes. Add in the chocolate chips and stir until melted. Serve over vanilla ice cream & top with Reese's. 

Store the sauce in the fridge & warm up in the microwave to serve again!  Makes 2 1/2 cups.

Thursday, May 26, 2011

Winner Announced!!!

Thank you so much to everyone who entered to win our Pizza Maker Kit Giveaway!!  We thoroughly enjoyed reading through all the comments! 

Our winner is:
#67
Rebelmom!!

Congratulations!!  Please e-mail us your name & mailing address so we can get your winnings shipped out to you! doublethedeliciousness@gmail.com

Thanks again to everyone who entered!!

Tuesday, May 24, 2011

Sunday Dinner Chicken & Rice

This was one of my family's favorite meals growing up.  It was always made on Sundays & put in the oven before church.  We loved smelling the wonderful aroma right when we opened the door after church! 

We've been making this in our family as well for the past 12 years.  It is one of my husbands favorites & one of the first meals I ever cooked for him after we were married.  (Although he loves anything with rice...so it couldn't go wrong!)

And I just found out that this is a recipe from my Grandma Wilson that she used to make for her children (my Dad's Mom).  After all these years I never knew that's where this recipe orignated...it will now forever make me think of my Grandma when we have it!  She was such a wonderful lady that I wish I would have been able to get to know better.  She passed away when I was 12, I believe, but I would love to have her counsel now that I'm a mother!  She raised 13 children...yes, they were all her own, and her & my Grandpa's posterity is now over 350, I believe!!  What a legacy they left!  And what a wonderful recipe!!

Sunday Dinner Chicken & Rice
2 cups rice (white or brown)
2 can cream of mushroom soup
3 1/2 cans milk
1 envelope onion soup mix
Boneless, skinless chicken breasts

Mix soups with the milk in a large casserole dish.  Add the rice and stir to combine.  Place chicken on top of the rice and cover.  Bake at 350 degrees for 2 hours. 
The time can be adjusted as well (as follows)
325 degrees for 2 1/2 hours
300 degrees for 3 hours
275 degrees for 3 1/2 hours
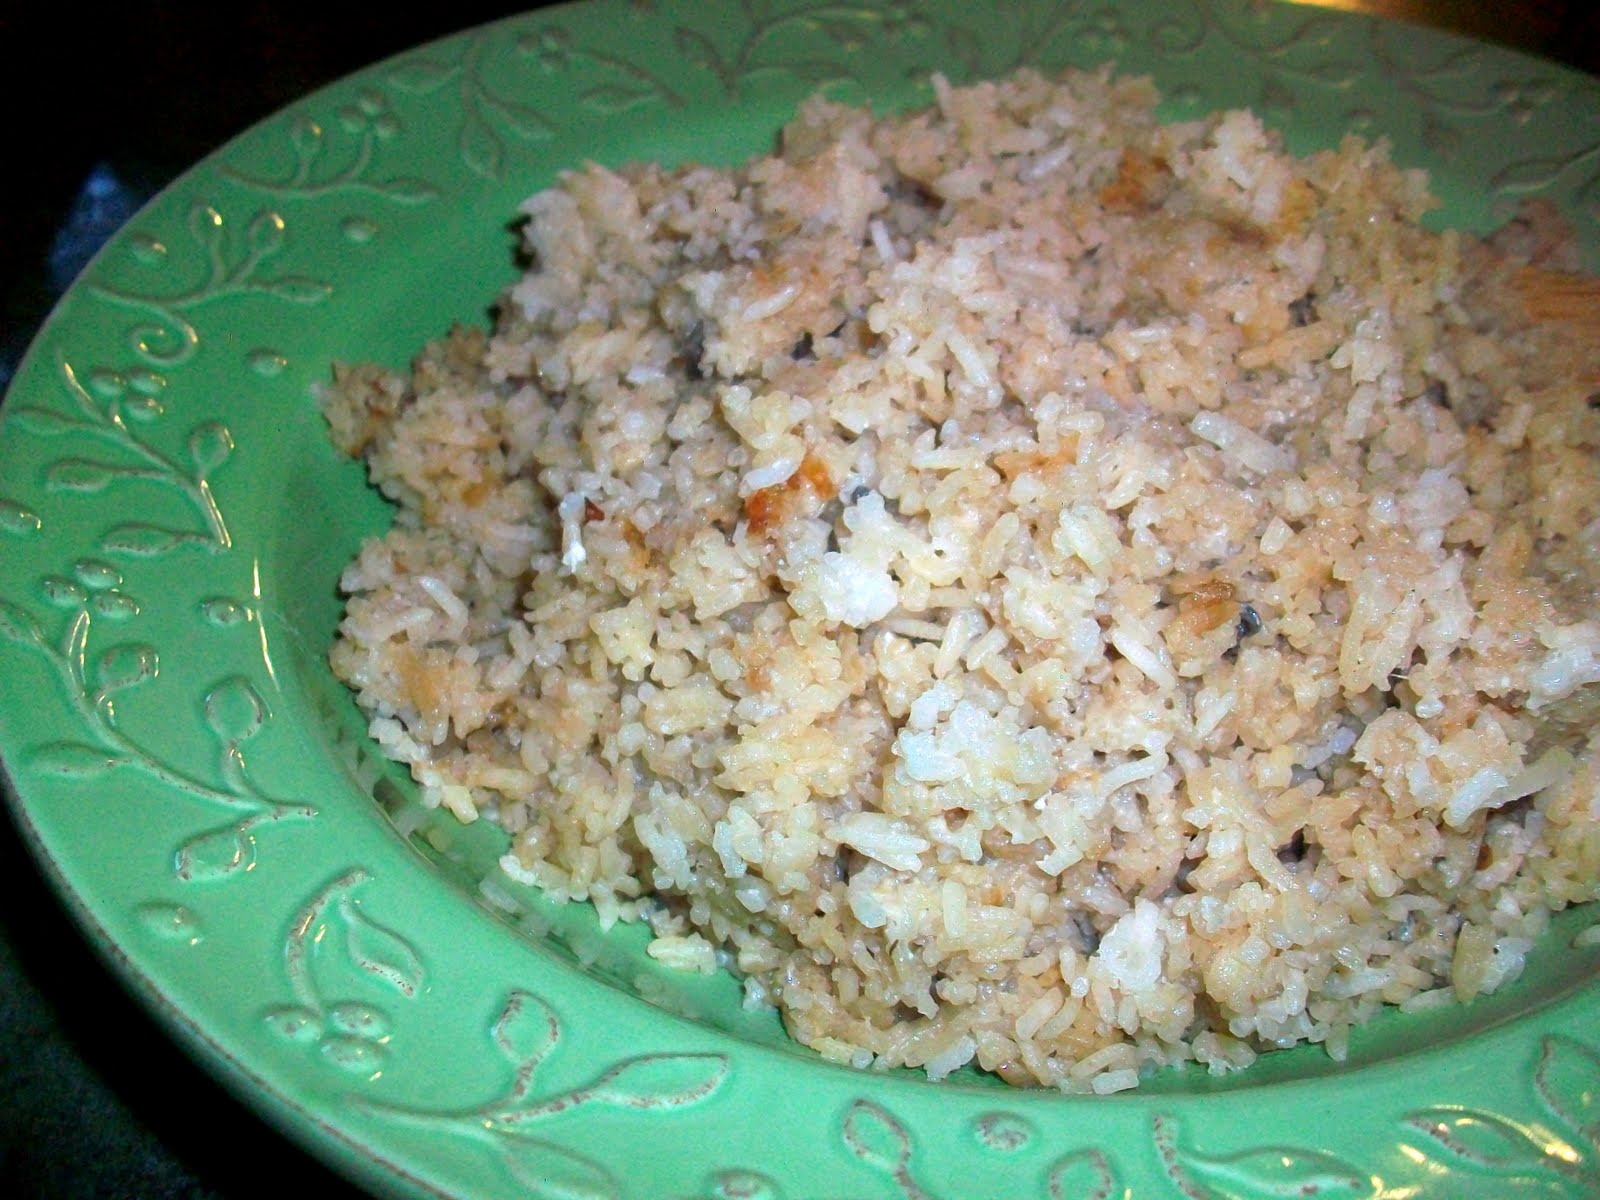
The wonderful, lovely rice...SO GOOD!!

Sunday, May 22, 2011

Sunday Dinner Rolls

These rolls are super delicious!  We were a little hesitant when we saw the Mayonaise on the ingredient list, but we knew we had to try them!!  The result...WONDERFUL!!  They are perfect for those Sunday dinners.  You don't have to spend a ton of time in the kitchen making the bread dough because these use Rhode's frozen dinner rolls.  So there is less clean-up & less time spent in the kitchen but you still get a wonderfully seasoned warm roll with your dinner!!

Sunday Dinner Rolls
Recipe from Your Homebased Mom
1 bag of frozen dinner rolls (I love Rhode's Rolls)
Mayonnaise
Melted butter
Freshly shredded Parmesan Cheese
Garlic Powder
Dried Parsley

Place the mayo, melted butter & Parmesan cheese in separate bowls.  How much depends on how many rolls you make.  We (I should say Kyla here!)  made 2 dozen & used about 1/4 cup mayo, 1/4 cup melted butter & about 1/2 cup of parmesan cheese.  Take a frozen ball of dough and dip just the top half into each bowl starting with the mayo, then the butter, then the cheese. 

Place the rolls in greased muffin tins with cheese side up.  Sprinkle with garlic powder & dried parsley and let it rise according to the roll package directions.  (I just covered mine with some towles and set them on the stove top and they were ready to be baked in about 2 hours...but the oven was on so it was a really warm place to help them raise quickly!)

Bake at 350 degrees for 15-20 minutes.

Friday, May 20, 2011

Brownie Chunk & Chocolate Chip Cookies

I've been putting off doing any baking since I don't have a mixer to make anything with!!  But I just couldn't wait until Tuesday (the day my replacement bowl is supposed to be here!) to try these out!!  So I psyched myself out & went for it the "old fashined way"!!:)  I can now tell you...I don't know how I ever lived without my mixer!!  There are only 2 positive things I can say...at least I got a workout & burned a few of the calories that I would consume later when the cookies were finished!:)  And #2...the cookies were fabulous...even without the mixer!! (Although I know they'd be just as fabulous WITH a mixer!!)

Brownie Chunk & Chocolate Chip Cookies
Recipe from Picky Palate
1 cup (2 sticks) unsalted butter, softened
3/4 cup granulated sugar
3/4 cup packed light brown sugar
2 large eggs
1 tablespoon vanilla
3 cups flour
1 teaspoon baking soda
1/2 teaspoon kosher salt
1 cup chocolate chips
2 cups cubed prepared brownies (I just used a boxed brownie mix...2 cups was about 1/3 of a 9 x 13 pan.  I'm certain you could use any brownie recipe for this!)

Preheat oven to 350 degrees.

Cream butter & sugars until light & fluffy.  (I used my electric hand mixer that I received for my wedding that hadn't been used in YEARS!)  Add the eggs and vanilla and beat until well combined.

Place the flour, baking soda, and salt into a large bowl, mixing to combine.  I gotta be honest...I usually always skip this step because I know my bosch will mix it in fabulously, but since I didn't have a bosch to use I went ahead and did this step.  Slowly add dry ingredients to wet ingredients and mix until combined.  Add the chocolate chips & brownie chunks and stir until just combined.  I just used a wooden spoon for this step...hence the great workout I got!!:) 

Use a medium scoop and scoop dough onto a greased baking sheet.  Bake for 9-11 minutes.  Let cool for 5 minutes before removing to a cooling rack.

Makes about 3 dozen cookies

Pour yourself a glass of milk & enjoy the best of 2 worlds...brownies & cookies!!

Thursday, May 19, 2011

In Mourning...and a GIVEAWAY!!:)

So I really needed something to cheer me up after what happened yesterday!!  What you may ask??  (for those of you who are not connected with facebook). 
THIS!!!
I know it's kind of hard to tell what in the world that is...let me enlighten you!  It's my bosch mixer bowl!!  It met it's demise at around 4:55 yesterday afternoon.  I had some chicken on the stove top boiling for dinner.  It was for the most wonderful and delightful Creamy Chicken Taquitos!  Oh how I love those!! 

Anyway, back to the story.  I had one final piano lesson for the year that was just ending when I smelled something a little suspect...just smelled like something was burning...so I figured I'd let the water boil out & was burning my chicken so I asked Tony to go check it out for me. 

His reply, "Um...it's not the chicken.  You better come look at this." 

So I sent my student on his way and made my way to the kitchen.  By this time the entire downstairs was filled with smoke & it stunk to HIGH HEAVEN!!

When I realized what had happened I just stood there dumbfounded, staring at the bowl and the plastic that was still bubbling/burning on the stove top. 

This is when the kid's starting filing into the kitchen.  "What's that smell?", "That smells awful!", "Why is there all this smoke?"  I have to say I kept it together pretty well...don't know how, but I did & I'm so glad.  Rhett (my 4 year old) fessed up right away.  He was trying to sneak into a cupcake that was sitting towards the back of the counter (I put them back there so he couldn't get into them...I really should know better!!:)), but the bowl was in the way so he pushed it to the side so he could reach.  Little did he know the side was the hot stove top.  He pushed it right along side the boiling chicken & the rest is history!!

On a good note though...dinner was still fabulous!!:)  Creamy Chicken Taquitos with yummy guacamole & the best Spanish Rice!!  And I have to say...Tony has always been the Spanish Rice maker in our family.  I'll make it if he's not around, but when he is I make him do it.  And...it was the best one yet!!  The rice texture was just perfect! 

It helped ease the pain.......some!:)

Anyway, to make me feel better I figured we'd do a fabulous giveaway today!!  Giveaways always lift my spirits!!:)  Here's what you can win:
I absolutely LOVE everything seen here!!  The winner will receive:

#1.  Large Round Pizza Stone

The benefits of a pizza stone:
•Evenly distributes heat and draws moisture away from the surface
•Retains heat, so your just-out-of-the-oven foods stay hot longer
•Virtually nonporous, so it doesn't retain oils, odors or flavors
•Microwave-, freezer-, and conventional and convection oven-safe

We absolutely LOVE ours...it has been used on many an occasion!!

#2. Large Metal Rack

 This sturdy metal rack helps you move the Large Round Stone from the oven to the table.


#3.  Pizza Cutter

I love that it's BIG...for those pizza's that have TONS of toppings on them (the kind I like!)  And it's dishwasher safe!!  Gotta love that!

#4.  Deluxe Cheese Grater 

 This is perfect for some fresh parmesan cheese on top of your pizza (or pasta!).  It will also grate chocolate...YUM...and nuts!  And it is also dishwasher safe!!

All item are from Pampered Chef...I know...I'm a little addicted to their stuff!!:)

HOW DO YOU WIN???!!!!

There are a few things you can do to enter.  Please leave a SEPARATE comment for each thing you do! 

1.  Leave a comment!!  Just anything you want to say and you're entered!!
2.  Become a PUBLIC follower of our blog (or state that you already are one!)
3.  Display our button on your blog.
4.  "Like" us on facebook (or comment that you already do!)
5.  Share the link to the contest on your facebook page.
6.  Mention the giveaway in a post on YOUR blog.

So you can have up to 6 entries if you do all the above!!

We will be accepting entries until Wednesday, May 25th.

Winner will be announced Thursday, May 26th!

Good Luck to you all!!

Wednesday, May 18, 2011

Strawberry Freezer Jam (the kiddo's all-time favorite jam!)

We ran out of this jam back in January & my kiddo's have not been happy!!  We'd been waiting to find a good sale on strawberries so I could make another stock pile until next year.  This time I'm making more than I think we'll need so as not to run out and have the wrath of my kiddo's every time they want a PB&J!!

We also love this jam on pancakes & waffles as well as toast and PB&J's, but my all-time favorite is on a piece of warm homemade white bread!!

Strawberry Freezer Jam
recipe from any box of pectin!!:)
4 cups mashed strawberries (about 2 1/2 pounds whole strawberries)
8 cups sugar
2 boxes of pectin
1 1/2 cups water

Wash & remove stems from strawberries and mash them.  You can mash them with a potato masher or I just like to blend them in my blender, but if you do that just don't blend them to death!  In a large bowl measure the EXACT amount of sugar...I know that's a lot of sugar, but it needs to be that much or else the jam will not set.  You can try the recipes on the less-sugar pectin boxes if that much sugar scares you to death!:)  Pour the strawberries over the sugar and stir until mixture is combined really well.  Let sit for 10 minutes.

When there is about 3-4 minutes left of the strawberry/sugar mixture start making the pectin.  Measure water into a medium sized sauce pan (you don't want it too small because when it starts to boil it boils up...I've had many a spill overs over the years!) and add the pectin.  It may be a little lumpy but will dissolve during this process so don't worry.  Bring the water/pectin to a boil stirring constantly.  When it reaches a boil, stir & boil for 1 minute.  Pour over the strawberries and mix for 3 minutes to ensure it's incorporated throughout.  Pour into freezer safe jars.  Let sit at room temperature for 24 hours and then put in the freezer for up to a year (we've used some past the year mark and it was still good) or store in the fridge for up to 3 weeks.

Makes about 5 pint size jars.

Hope you enjoy as much as we do!!
Related Posts Plugin for WordPress, Blogger...