Tuesday, February 28, 2012

Spanish Rice (budget dinner side or main dish)

If you need something really inexpensive to add to any meal, or to use as a meal with different sides, that tastes wonderful & is the most loved food that my 10 year old asks for almost every DAY....you've come to the right place!:)

This is a recipe we have already posted here, but since I started the Budget Dinners section I thought I'd introduce it again.  If you add the ground beef in you've got yourself a main dish.  Serve it with some tortillas and some fruit. 

My family loves rice and I love that they love rice cause it is really economical right now!  You'll be blown away by these numbers!

Oh, and incidentally, another reason I love this recipe.  MY HUSBAND MAKES IT!!  You heard me right!  This one dish he has mastered & it gives me a break from the kitchen!  What a perfect meal!:)
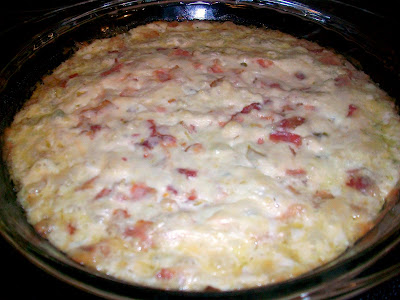
Spanish Rice
Budget Dinner Totals: Makes about 12 (1 cup) servings.  Without meat (as a side)=$2.59...that's 21 cents per serving!!  With meat (as a main dish)=$5.59 or 47 cents per serving!
Pin It
(pictured without meat)
3 cups rice (we use Jasmine rice...it has a nuttier taste and is perfect for Spanish rice)
1-2 Tablespoons oil
1/2 of a green pepper, chopped
1/2 of a yellow onion, chopped
1 lb. ground beef, browned(optional)
2 cans (small ones) tomato sauce
5 1/2 tomato sauce cans full of water
4 garlic cloves, chopped or pressed
1 teaspoon cumin
pepper and salt to taste
Put your rice in a large pot and place on the stove top. Add enough oil to coat all the rice.  Brown the rice and oil on medium high heat stirring frequently. The rice will start to turn white(er) than it already is and then it will start to brown. You don't want it a dark brown but a light golden brown and not all of the rice will brown, but when the majority is browned it is ready.  This is what gives the rice the wonderful texture that it needs, so don't skip this part!!!:)
Once the rice is ready add the remaining ingredients. The key to the salt is to taste the broth before you start timing the rice. It needs to be a little saltier than normal because the rice will soak up a lot of the salt. When it tickles your taste buds, bring it to a boil and then cover and simmer on low heat for 20 minutes. Enjoy with absolutely anything!!! We usually don't put in the meat if we are using it as a side dish, but sometimes Tony just likes to make it to eat as a meal in itself and he'll add the meat then (actually I think he would add the meat every time...It's me that doesn't think we need double meat at a meal!:))

Monday, February 27, 2012

Vanilla Swirl Cupcakes (make them for your special team!)

Kyla was assigned treats for their last basketball game of the year on Saturday.  So of course she wanted to do something fun and fancy.  So we came up with these fabulous cupcakes. 

Kyla came up with the ideas of the D (for her team name) and the green swirled in the cupcakes (her team colors) that made this cupcake so cute.  What great ideas, glad I've got her creative side to help out in these situations!

The cupcakes were absolutely delicious & fun.  Hopefully they helped take the sting out of the loss!  But the girls had a great season and played really hard.  Kyla has improved by leaps and bounds this year, it has been really exciting to watch her!  Now I can't wait until next season!

Vanilla Swirl Cupcakes
1 box white cake mix
1/3 cup oil
1/2 cup milk
1/4 cup heavy cream (or you can also use buttermilk)
4 egg whites
2 teaspoons vanilla
3/4 cup sour cream
Frosting of your choice

Preheat oven to 350 degrees, and line muffin tins with cupcake liners.

In your mixer (or large bowl) combine the oil, milks, egg whites, vanilla and sour cream.  Add the cake mix and mix until combined and smooth.

Remove about 1/4 of the batter to a separate bowl and using food coloring of your choice, dye half of the batter (of course we chose green because that's her team colors).

Scoop the white mix into liners about 1/2 full.  Then add the colored batter to fill about 3/4 full.  Using a toothpick, swirl the green around into the white.

Bake for 17-20 minutes or until a knife inserted comes out clean.

Once the cupcakes have cooled, pipe your desired flavor of icing on top.

You can really dress these up with a monogram topper and some sprinkles.

For the topper we just melted vanilla Almond Bark and dyed it green.  We then piped the "D" onto wax paper and let it cool.  Then just stick it right into the top of the frosting.

Beautiful!

Wednesday, February 22, 2012

Blackberry Ginger Crisp

There's something about ginger that I love.  The smell is intoxicating to me.  Especially freshly grated ginger.  I love to just sniff it all through the cooking process whenever I get the chance to use it (which isn't very often).  But this recipe is one of those times!

Some would think that blackberries and ginger don't go together.  I'm here to say THEY'RE WRONG!!  They compliment each other so wonderfully I don't think I'll ever have another blackberry dessert without adding some ginger of some sort.

So keep your eyes peeled for blackberries on sale & make this dessert! (and please don't forget the ice cream...and serve it warm...and savor every bite...got it??)

Blackberry Ginger Crisp
Pin It
4 cups fresh blackberries
4 Tablespoons sugar
2 teaspoon cornstarch
3 teaspoons water
1 teaspoon lemon juice
1 cup quick-cooking oats
1/2 cup flour
1 teaspoon cinnamon
1 teaspoons freshly grated ginger
1/2 cup cold butter
Vanilla Ice Cream

Wash blackberries and drain any excess water off of them.  Pour into a 9 x 13 baking dish. 

In a small bowl combine the sugar, cornstarch, water and lemon juice and stir until smooth.  Pour mixture over the berries.

Combine the oats, flour, brown sugar, cinnamon, and ginger in a large bowl.  Cut in the cold butter using a pastry blender until crumbly.  Sprinkle over the berries.

Bake at 375 degrees for 20-25 minutes or until filling is bubbly.  Serve warm with vanilla ice cream. (Vanilla Bean is the best in my opinion!:))

Monday, February 20, 2012

Oven Roasted Brussel Sprouts

I've never had a problem with Brussels Sprouts.  I remember eating them growing up and liking them, so when I had the opportunity to try them out on my kiddo's I was really excited to see what they would think.  Well, guess what??  They all really liked them!  Especially my 4 year old Rhett who is a broccoli lover too (I know...weird!) 

And I have to say I think roasting is the way to go.  These really were delicious. (Never thought I'd say that when talking about Brussels Sprouts!)

Oven Roasted Brussels Sprouts
Pin It
1-2 pounds Brussels Sprouts
2-4 Tablespoons Olive Oil
1-2 teaspoons Kosher Salt
1/2-1 teaspoon black pepper
Freshly grated Parmesan cheese, optional

Note:  I know the measurements aren't exact, so you just need to adjust them to how many pounds of sprouts you have.  If you have 1 pound use the lower end of the ingredients, 2-the higher end, 1 1/2--the middle, not rocket science, but thought I'd clear it up.

Rinse Brussels Sprouts in cold water.  Cut the ends off and pull off any yellow outer leaves.  Place in a large Ziploc baggie or large bowl with a lid.  Drizzle the olive oil and sprinkle the salt & pepper over the Brussels sprouts.  Seal bag (or put lid on bowl) and shake until the sprouts are coated.  

Pour them onto a large cookie sheet in a single layer and bake in a preheated 400 degree oven for 35-40 minutes, or until tender on the inside & crisp on the outside.  The outsides will get black in places, but it's good!:)  If you feel inclined to add the Parmesan, (which I most often do!) sprinkle it on top now.

Pull out of oven and iIf you feel inclined to add the Parmesan (which I most often do!), sprinkle it on top now and serve immediately.  You can sprinkle a little more kosher salt over them before eating too if you'd like (I do that too...I like them salty!)

Enjoy!

Thursday, February 16, 2012

Chocolate Chip Cookie Dough Truffles

Sometimes I just have an immense craving for cookie dough.  And although the raw eggs thing has never deterred me from snitching a bite (or 2 or 3) of cookie dough while baking cookies, I was excited to find this recipe that does not have any eggs in it at all! 

And boy was it good...so hold on to your hats!:)

Chocolate Chip Cookie Dough Truffles
Recipe from Love and Olive Oil
Pin It
2 1/2 cups flour
1 teaspoon salt
1/4 teaspoon baking soda
1 cup (2 sticks) butter, room temperature
3/4 cup sugar
3/4 cup packed brown sugar
1 teaspoon vanilla
1/3 cup milk
1 cup mini semi-sweet chocolate chips
14 oz dark chocolate candy coating (I've used chocolate flavoried Almond Bark too)

Beat the butter and sugars until light and fluffy. Add milk and vanilla. Stir in flour, baking soda and salt and mix on low speed until incorporated. Stir in chocolate chips.

Cover and chill dough for 1 hour.  (I know all the waiting is rough!)

When your dough is firm enough to handle, form it into about 1" size balls and place on a cookie sheet lined with wax paper.  Place in the freezer for about 30 minutes.  (I know....more waiting!!)

Melt chocolate candy coating in microwave according to package directions. You can use toothpicks or a spoon to dip the cookie balls into the chocolate.  Tap to remove any excess chocolate and then place it back on the wax paper.  When all the balls are coated, place in the fridge until set.  (Trust me...all the waiting is worth it!)

Store in the fridge in an airtight container for up to 1 week!

Monday, February 13, 2012

Valentine Popcorn Mix

I love Valentine's Day.  I always have, even back in the days when I didn't have a significant other to spend the day with.  (It also might have something to do with it being my birthday a few days afterward...just a good week all the way around!:))

I'm a dreamer & I loved dreaming of the times I'd spend with the one I love on Valentine's Day.  Of course back then I never dreamed about the kids' in the mix. (not that I didn't want kids, I just pictured them with a babysitter or something!:))  But V-day isn't exactly as I pictured growing up, most of the time we have dinner with the family. 

Which is nice. 

Occasionaly Tony and I get to get out by ourselves and enjoy an evening out for Valentine's, but not this year.  We're planning on Chicken Alfredo with Twisty Breadsticks for our special dinner (with the kids) tomorrow night!  I know, super boring, but I'm ok with that!  Sometimes it's just nice to be home & relax.  I'll probably even use paper goods so I dont' have to do dishes (yes, my dishwasher is still broken!!), that's pretty romantic to me right there!:)

Anyway, we also love to have a fun snack.  Usually we're making sugar cookies and frosting them, but this year we made some wonderful popcorn mix.  YUM!

Valentine Popcorn Mix
Pin It
12 cups popped plain popcorn (about 1/2 cup popcorn kernels)
1 1/2 cup Valentine candy corn
1 1/2 cups Cherry gummy hearts (you could also use cinnamon if you like)
12 oz. (6 squares) Vanilla flavored Almond Bark
2 oz. (1 square) Chocolate flavored Almond Bark (or about 1/2 cup chocolate chips)

Place the popcorn in a large mixing bowl.  Cut the gummy hearts into quarters and add to the popcorn.  Try to unstick them as best you can!:)  Add the candy corn as well.  Set aside.

Melt the vanilla almond bark in a microwave safe bowl at 30 second intervals until it is melted and smooth.  Pour over the popcorn and using a wooden spoon mix together until everything is coated. 

Pour onto wax paper in a single layer.  Melt the chocolate at 30 second intervals as well until melted.  Drizzle the chocoalte over the popcorn.  Let sit until chocolate has hardened.  Put in a large bowl & snack away!

Friday, February 10, 2012

Chocolate Covered PB Sandwich Cookies (with other Valentine Ideas)

These are so easy I don't know if you can officially call it a recipe, but we absolutely love them here at my house and they make a really cute and fun Valentine's treat, so I figured I'd share them anyway!

Chocolate Covered PB Sandwich Cookies
Pin It
Ritz Crackers
Creamy Peanut Butter
Chocolate (or Vanilla) flavored Almond Bark

Spread PB on one side of ritz cracker and place another ritz on top to make a sandwich. (see how easy!)  Place on wax paper.  Melt Almond Bark and coat each sandwich and place back on wax paper.  Decorate with sprinkles of your choice!  Let chocolate harden and then they are ready to eat!

Can also coat in Vanilla Almond Bark


So easy, yet so delicious! (our motto!:))

Also, in case anyone is interested:
 
My kiddo's absolutely love this tradition we started 4 or 5 years ago.  They get so excited to make these and take them to their teacher!  A good old classic Candy Bar Card.  I let them write it (so it's not perfect, which kind of bothers me, but it's more personal for their teacher's and they love doing it...so it's OK!:)) and glue on their candy.  This year Eli decided he wanted to make a little puzzle for his teacher.  He put heart stickers all over it and told his teacher she had to find all 8 of them!:)  Such a fun kid!

Here's the words just in case you can't read the picture:
Dear (Teacher),
The "Reisen" for this card is to wish you a "Happy Valentine's Day" (Box of chocolates or something else that says Happy Valentine's Day on it).  You are great and "skor" a perfect 10 as a teacher.  I'd like to give you an "extra" "Payday" or "100 grand" for all you do.  I know you are "good and plenty" busy with "mounds" of work, but both "now and later" you are a "lifesaver" as you "dove" (in the past I've been able to find Dove candy bars, but this year they were no where to be found, so we ended up buying a package of small dove chocolate and they say "dove" on them so it worked out!) in to help me out of any "crunch" I may be in.  You're helping me to not be an "airhead" (alternate that we've used is "you're helping me to become a "smartie").  I could search the universe including a "starburst" (can also use Mars bars, but we couldn't find those this year either) and the "milky way" and would never find a teacher better than you!  Thank you!
"hugs" (Student name)

And, this we started a couple of years ago with my hubby's class (he teaches 2nd grade).  We wanted to find something different and special that he could give his class and we saw this idea (sorry...I have no idea where) and loved it!  His students have loved it...they think it's pretty silly!:)  We just attach the card to bag of candy with some Valentine garland and it's ready to go!
 

Wednesday, February 8, 2012

Chili Seasoning Mix (with Chili recipe)

We had Chili the other night.  Eli (my 8 year old) asked me as I brought the chili to the table what kind of chili I made.  I told him it was the same one I'd always made. 

He responded, "you mean it's a homemade Chili?" 

"Yes Eli, I've always made homemade Chili."

"What?  I thought you just used the boughten Chili!  Wow, I knew you were a good cook, but you're even better than I thought!"

Glad that a bowl of Chili can excite my 8 year old!  And I'm surprised that it's taken him this long to notice that I don't just open a can of Chili every time we have it!:)

I've been using this recipe for years and it is so easy and so good!  We eat the Chili with Cornbread, over baked potatoes, and over our Scones for Navajo Tacos

Chili Seasoning Mix (with Chili recipe)
Budget Dinner Totals: Makes 8 (1 cup) servings (approx.) for $6.57, making each serving a whopping 82 cents per serving!
For Seasoning:
1/2 cup Chili Powder
4 teaspoons cumin
1 teaspoon paprika
1 Tablespoon season salt
2 teaspoons garlic powder
1 teaspoon onion powder
1/2-1 teaspoon cayenne pepper (depending on if you like it HOT!)
2 teaspoons thyme
2 teaspoons oregano
dash of red pepper flakes

Mix all ingredients together in a bowl and store in an airtight container.  I put mine in a 1/2 pint jar.  This recipe can also be doubled or tripled for however much you think you may need.  This recipe is enough for about 6 Chili recipes.

For the Chili:
1 pound ground beef
1/2 onion, chopped
2 cans (8 oz.) tomato sauce
2 cans (14.5 oz.) diced tomatoes (I like the petite, but regular works fine too)
2 cans (15.5 oz.) kidney beans (dark or light)
3 Tablespoons Chili Seasoning (from above)

Brown beef with the onion in a large saucepan.  Drain.  Add the rest of the ingredients with their juices, don't drain and rinse the beans!  Stir together and bring to a simmer.  Turn heat to low and let simmer for about 20 minutes.

Monday, February 6, 2012

Strawberry Lemon Cupcakes in a Jar

Since Valentine's Day is right around the corner I thought I'd post these cute and wonderfully delicious cupcakes!

They are different than the usual Valentine's treat, which is why I think they're awesome!  And they are oh-so-good! 

Present this to someone special & they'll know they're loved!:)

Strawberry Lemon Cupcakes in a Jar
Pin It

For the Cupcakes:
1 package lemon cake mix
1 cup sour cream
3/4 cup water
3/4 cup oil
4 eggs
1 small package instant lemon pudding

Pour cake mix, and lemon pudding into mixer.  Add the sour cream, water, oil, and eggs and beat for a few minutes.  The batter is pretty thick.  Scoop into lined cupcake tins and bake for 20 minutes at 350 degrees.  Check with toothpick to make sure they're done.  Let cool.

Lemon Buttercream Frosting:
1 cup butter, at room temperature
6-8 cups powdered sugar
1/2 cup fresh lemon juice
1 teaspoon lemon zest

Place the butter in your mixer.  Add 4 cups of the powdered sugar, the juice and the zest.  Beat until smooth and creamy.  Gradually add the remaining sugar, 1 cup at a time, until it reaches the desired consistency. (I use about 7 cups altogether)

To assemble you will also need:
1/2 pint canning jars,
strawberries, fresh or frozen, sliced.  (If using frozen berries, let thaw in a colander to remove the juices before using.)
Piping bag and large tip
pretty red ribbon of your choice

Take cooled cupcakes out of their liners and cut in half so there is the top and the bottom (hamburger style as my kiddo's call it).  Place the bottom portion at the bottom of each jar.  Pipe frosting over the bottom part and then top with some strawberries (3-4 slices works).  Then place the top half of the cupcake on top and cover with frosting again. 

To top it off you can either place a strawberry slice (I would only recommend this if you are using fresh strawberries) or some pretty red sprinkles of some kind look nice. 

Finish it off by tying a pretty red ribbon around the jar and you've got yourself some beautiful Valentine's treats (or any day of the week treat for that matter)!!

Enjoy!

Wednesday, February 1, 2012

The Super Bowl Party Food Line-up!

I like football.  (Especially if I'm watching my sons play!)  But I've never gotten into the hype of the Super Bowl.  Please don't hate!  What I do love though is the food at a Super Bowl Party!

We rarely watch the Super Bowl unless my honey's team is in it (not this year...he's a Steelers fan!), but even if we don't watch it...we still have a Super Bowl Party with our family.  Sometimes we'll put in a movie to watch together or we'll play board games.  But no matter what we do...we always have awesome food!

So if you're in need of some wonderful foods for a Super Bowl Party...look no further!  The football crazies in our home would love to see these foods at their Super Bowl Party.  (Which means most men will love everything on here...but so will you women!:))  These recipes are a TOUCHDOWN!! (sorry, couldn't help myself!) 

Super Bowl Party Food

Appetizers:

Sides:


Main Dish:


(this is just the meat...you put it on toasted buns with melted cheese...SO GOOD!)

or you could try some Soup:


Anyone else have some killer recipes that would be great for this weekend?  If so, please share the link (if there is one) in the comments and let us know what you've got planned!
Related Posts Plugin for WordPress, Blogger...