Monday, May 30, 2011

Peanut Butter Fudge Sauce

This ice cream topping is one of my favorites!!  If you love peanut butter & chocolate this is the one for you!!  It is so super simple to make & can be whipped up in a flash to take that bowl of vanilla ice cream OVER THE TOP!!  Just top with some Reese's chunks or with the new mini reese's cups (they are so stinkin' cute):) and you've got a masterpiece!

Peanut Butter Fudge Sauce
1 cup corn syrup -- light or dark
1 cup creamy peanut butter
1/2 cup heavy cream
1 cup semisweet chocolate chips

In a 2-quart microwaveable bowl combine corn syrup, peanut butter, and cream. Microwave on HIGH for about 1 1/2 minutes. Add in the chocolate chips and stir until melted. Serve over vanilla ice cream & top with Reese's. 

Store the sauce in the fridge & warm up in the microwave to serve again!  Makes 2 1/2 cups.

Thursday, May 26, 2011

Winner Announced!!!

Thank you so much to everyone who entered to win our Pizza Maker Kit Giveaway!!  We thoroughly enjoyed reading through all the comments! 

Our winner is:
#67
Rebelmom!!

Congratulations!!  Please e-mail us your name & mailing address so we can get your winnings shipped out to you! doublethedeliciousness@gmail.com

Thanks again to everyone who entered!!

Tuesday, May 24, 2011

Sunday Dinner Chicken & Rice

This was one of my family's favorite meals growing up.  It was always made on Sundays & put in the oven before church.  We loved smelling the wonderful aroma right when we opened the door after church! 

We've been making this in our family as well for the past 12 years.  It is one of my husbands favorites & one of the first meals I ever cooked for him after we were married.  (Although he loves anything with rice...so it couldn't go wrong!)

And I just found out that this is a recipe from my Grandma Wilson that she used to make for her children (my Dad's Mom).  After all these years I never knew that's where this recipe orignated...it will now forever make me think of my Grandma when we have it!  She was such a wonderful lady that I wish I would have been able to get to know better.  She passed away when I was 12, I believe, but I would love to have her counsel now that I'm a mother!  She raised 13 children...yes, they were all her own, and her & my Grandpa's posterity is now over 350, I believe!!  What a legacy they left!  And what a wonderful recipe!!

Sunday Dinner Chicken & Rice
2 cups rice (white or brown)
2 can cream of mushroom soup
3 1/2 cans milk
1 envelope onion soup mix
Boneless, skinless chicken breasts

Mix soups with the milk in a large casserole dish.  Add the rice and stir to combine.  Place chicken on top of the rice and cover.  Bake at 350 degrees for 2 hours. 
The time can be adjusted as well (as follows)
325 degrees for 2 1/2 hours
300 degrees for 3 hours
275 degrees for 3 1/2 hours
The wonderful, lovely rice...SO GOOD!!

Sunday, May 22, 2011

Sunday Dinner Rolls

These rolls are super delicious!  We were a little hesitant when we saw the Mayonaise on the ingredient list, but we knew we had to try them!!  The result...WONDERFUL!!  They are perfect for those Sunday dinners.  You don't have to spend a ton of time in the kitchen making the bread dough because these use Rhode's frozen dinner rolls.  So there is less clean-up & less time spent in the kitchen but you still get a wonderfully seasoned warm roll with your dinner!!

Sunday Dinner Rolls
Recipe from Your Homebased Mom
1 bag of frozen dinner rolls (I love Rhode's Rolls)
Mayonnaise
Melted butter
Freshly shredded Parmesan Cheese
Garlic Powder
Dried Parsley

Place the mayo, melted butter & Parmesan cheese in separate bowls.  How much depends on how many rolls you make.  We (I should say Kyla here!)  made 2 dozen & used about 1/4 cup mayo, 1/4 cup melted butter & about 1/2 cup of parmesan cheese.  Take a frozen ball of dough and dip just the top half into each bowl starting with the mayo, then the butter, then the cheese. 

Place the rolls in greased muffin tins with cheese side up.  Sprinkle with garlic powder & dried parsley and let it rise according to the roll package directions.  (I just covered mine with some towles and set them on the stove top and they were ready to be baked in about 2 hours...but the oven was on so it was a really warm place to help them raise quickly!)

Bake at 350 degrees for 15-20 minutes.

Friday, May 20, 2011

Brownie Chunk & Chocolate Chip Cookies

I've been putting off doing any baking since I don't have a mixer to make anything with!!  But I just couldn't wait until Tuesday (the day my replacement bowl is supposed to be here!) to try these out!!  So I psyched myself out & went for it the "old fashined way"!!:)  I can now tell you...I don't know how I ever lived without my mixer!!  There are only 2 positive things I can say...at least I got a workout & burned a few of the calories that I would consume later when the cookies were finished!:)  And #2...the cookies were fabulous...even without the mixer!! (Although I know they'd be just as fabulous WITH a mixer!!)

Brownie Chunk & Chocolate Chip Cookies
Recipe from Picky Palate
1 cup (2 sticks) unsalted butter, softened
3/4 cup granulated sugar
3/4 cup packed light brown sugar
2 large eggs
1 tablespoon vanilla
3 cups flour
1 teaspoon baking soda
1/2 teaspoon kosher salt
1 cup chocolate chips
2 cups cubed prepared brownies (I just used a boxed brownie mix...2 cups was about 1/3 of a 9 x 13 pan.  I'm certain you could use any brownie recipe for this!)

Preheat oven to 350 degrees.

Cream butter & sugars until light & fluffy.  (I used my electric hand mixer that I received for my wedding that hadn't been used in YEARS!)  Add the eggs and vanilla and beat until well combined.

Place the flour, baking soda, and salt into a large bowl, mixing to combine.  I gotta be honest...I usually always skip this step because I know my bosch will mix it in fabulously, but since I didn't have a bosch to use I went ahead and did this step.  Slowly add dry ingredients to wet ingredients and mix until combined.  Add the chocolate chips & brownie chunks and stir until just combined.  I just used a wooden spoon for this step...hence the great workout I got!!:) 

Use a medium scoop and scoop dough onto a greased baking sheet.  Bake for 9-11 minutes.  Let cool for 5 minutes before removing to a cooling rack.

Makes about 3 dozen cookies

Pour yourself a glass of milk & enjoy the best of 2 worlds...brownies & cookies!!

Thursday, May 19, 2011

In Mourning...and a GIVEAWAY!!:)

So I really needed something to cheer me up after what happened yesterday!!  What you may ask??  (for those of you who are not connected with facebook). 
THIS!!!
I know it's kind of hard to tell what in the world that is...let me enlighten you!  It's my bosch mixer bowl!!  It met it's demise at around 4:55 yesterday afternoon.  I had some chicken on the stove top boiling for dinner.  It was for the most wonderful and delightful Creamy Chicken Taquitos!  Oh how I love those!! 

Anyway, back to the story.  I had one final piano lesson for the year that was just ending when I smelled something a little suspect...just smelled like something was burning...so I figured I'd let the water boil out & was burning my chicken so I asked Tony to go check it out for me. 

His reply, "Um...it's not the chicken.  You better come look at this." 

So I sent my student on his way and made my way to the kitchen.  By this time the entire downstairs was filled with smoke & it stunk to HIGH HEAVEN!!

When I realized what had happened I just stood there dumbfounded, staring at the bowl and the plastic that was still bubbling/burning on the stove top. 

This is when the kid's starting filing into the kitchen.  "What's that smell?", "That smells awful!", "Why is there all this smoke?"  I have to say I kept it together pretty well...don't know how, but I did & I'm so glad.  Rhett (my 4 year old) fessed up right away.  He was trying to sneak into a cupcake that was sitting towards the back of the counter (I put them back there so he couldn't get into them...I really should know better!!:)), but the bowl was in the way so he pushed it to the side so he could reach.  Little did he know the side was the hot stove top.  He pushed it right along side the boiling chicken & the rest is history!!

On a good note though...dinner was still fabulous!!:)  
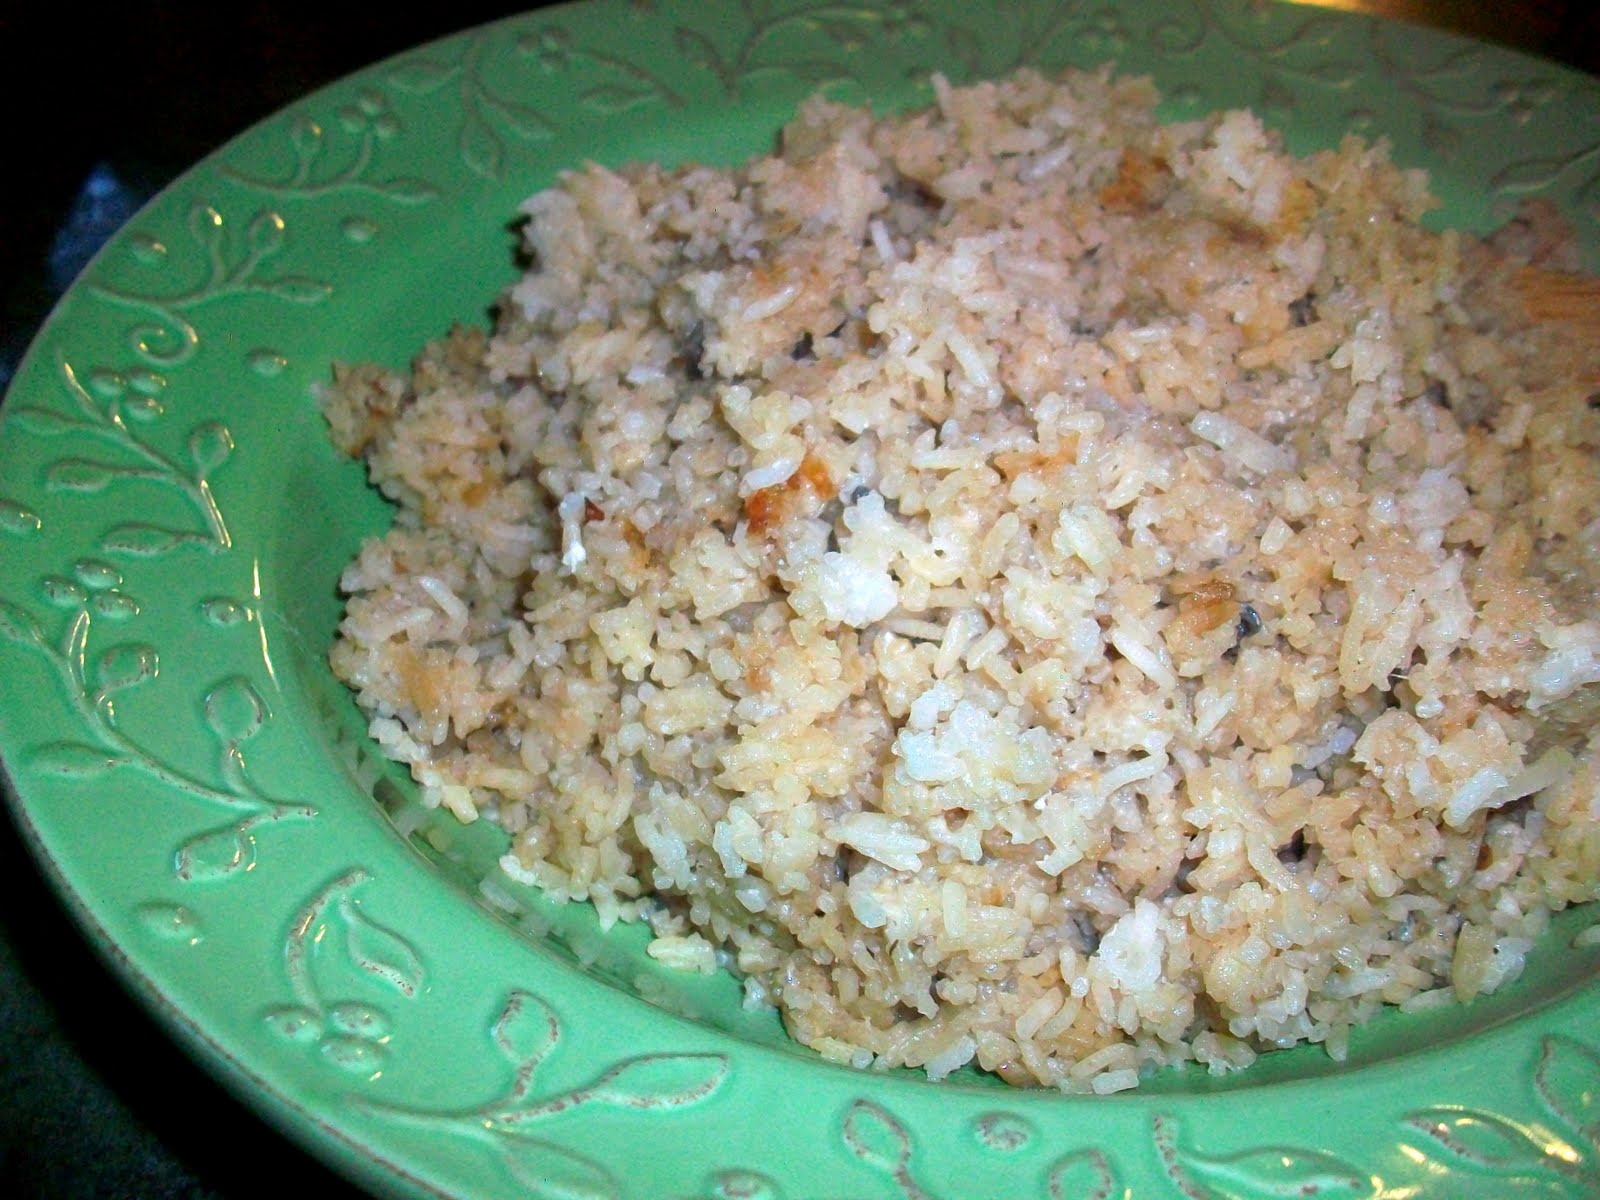
Creamy Chicken Taquitos with yummy guacamole & the best Spanish Rice!!  And I have to say...Tony has always been the Spanish Rice maker in our family.  I'll make it if he's not around, but when he is I make him do it.  And...it was the best one yet!!  The rice texture was just perfect! 

It helped ease the pain.......some!:)

Anyway, to make me feel better I figured we'd do a fabulous giveaway today!!  Giveaways always lift my spirits!!:)  Here's what you can win:
I absolutely LOVE everything seen here!!  The winner will receive:

#1.  Large Round Pizza Stone

The benefits of a pizza stone:
•Evenly distributes heat and draws moisture away from the surface
•Retains heat, so your just-out-of-the-oven foods stay hot longer
•Virtually nonporous, so it doesn't retain oils, odors or flavors
•Microwave-, freezer-, and conventional and convection oven-safe

We absolutely LOVE ours...it has been used on many an occasion!!

#2. Large Metal Rack

 This sturdy metal rack helps you move the Large Round Stone from the oven to the table.


#3.  Pizza Cutter

I love that it's BIG...for those pizza's that have TONS of toppings on them (the kind I like!)  And it's dishwasher safe!!  Gotta love that!

#4.  Deluxe Cheese Grater 

 This is perfect for some fresh parmesan cheese on top of your pizza (or pasta!).  It will also grate chocolate...YUM...and nuts!  And it is also dishwasher safe!!

All item are from Pampered Chef...I know...I'm a little addicted to their stuff!!:)

HOW DO YOU WIN???!!!!

There are a few things you can do to enter.  Please leave a SEPARATE comment for each thing you do! 

1.  Leave a comment!!  Just anything you want to say and you're entered!!
2.  Become a PUBLIC follower of our blog (or state that you already are one!)
3.  Display our button on your blog.
4.  "Like" us on facebook (or comment that you already do!)
5.  Share the link to the contest on your facebook page.
6.  Mention the giveaway in a post on YOUR blog.

So you can have up to 6 entries if you do all the above!!

We will be accepting entries until Wednesday, May 25th.

Winner will be announced Thursday, May 26th!

Good Luck to you all!!

Wednesday, May 18, 2011

Strawberry Freezer Jam (the kiddo's all-time favorite jam!)

We ran out of this jam back in January & my kiddo's have not been happy!!  We'd been waiting to find a good sale on strawberries so I could make another stock pile until next year.  This time I'm making more than I think we'll need so as not to run out and have the wrath of my kiddo's every time they want a PB&J!!

We also love this jam on pancakes & waffles as well as toast and PB&J's, but my all-time favorite is on a piece of warm homemade white bread!!

Strawberry Freezer Jam
recipe from any box of pectin!!:)
4 cups mashed strawberries (about 2 1/2 pounds whole strawberries)
8 cups sugar
2 boxes of pectin
1 1/2 cups water

Wash & remove stems from strawberries and mash them.  You can mash them with a potato masher or I just like to blend them in my blender, but if you do that just don't blend them to death!  In a large bowl measure the EXACT amount of sugar...I know that's a lot of sugar, but it needs to be that much or else the jam will not set.  You can try the recipes on the less-sugar pectin boxes if that much sugar scares you to death!:)  Pour the strawberries over the sugar and stir until mixture is combined really well.  Let sit for 10 minutes.

When there is about 3-4 minutes left of the strawberry/sugar mixture start making the pectin.  Measure water into a medium sized sauce pan (you don't want it too small because when it starts to boil it boils up...I've had many a spill overs over the years!) and add the pectin.  It may be a little lumpy but will dissolve during this process so don't worry.  Bring the water/pectin to a boil stirring constantly.  When it reaches a boil, stir & boil for 1 minute.  Pour over the strawberries and mix for 3 minutes to ensure it's incorporated throughout.  Pour into freezer safe jars.  Let sit at room temperature for 24 hours and then put in the freezer for up to a year (we've used some past the year mark and it was still good) or store in the fridge for up to 3 weeks.

Makes about 5 pint size jars.

Hope you enjoy as much as we do!!

Monday, May 16, 2011

Easy Chicken Enchiladas (with Cooking Creme)

I have loved using these new cooking creme's!!  They make those really hectic-got to throw something in the oven quick or we won't be eating dinner-kind of nights easier!!  I was a little leery of this recipe because the Sante Fe cooking creme has a different kind of smell when you first open it, but trust me when I say...it was so good!!  My family scarfed this one up! 

Easy Chicken Enchiladas
1 small onion, chopped
2 teaspoons oil
3 cups shredded cooked chicken breasts
1 can (14.5 oz.) diced tomatoes, drained
1 tub (10 oz.) Philadelphia Sante Fe Cooking Creme, divided
1 cup shredded colby jack cheese (or mexican style if you're into the pre-shredded stuff), divided
8 flour tortillas

Heat oven to 350 degrees.  Heat oil in a large skillet and cook onions for 4 to 5 minutes.  Stir in chicken, tomatoes, 3/4 cup of the cooking creme and 1/2 cup shredded cheese.

Spoon about 1/3 cup of chicken mixture into tortillas.  Roll up and place in a greased 9 x 13 inch baking dish.  Top with the remaining cooking creme and cheese.  Cover.

Bake 15 to 20 minutes or until heated through.

These are really good as is, but I think they're better with a little sour cream, lettuce & tomatoes on top!!  Either way...hope you enjoy!!

Friday, May 13, 2011

Show-off Salad

The weather is soooo beautiful today!!  I absolutely LOVE spring time!!

This recipe is great for days like this!  It's a make ahead recipe, so you can just pull it out of the fridge when it's time to eat & you're good to go!  It can be used as a main dish or a side either way.  If you serve it as your main dish, just make some nice Pan Rolls or this Bacon Swiss bread to go with it & you're set!

Show-off Salad
2 cups uncooked elbow macaroni
1 tablespoon canola oil
3 cups shredded lettuce
1 medium green pepper, chopped
1 medium cucumber, peeled, and diced
4 hard-boiled eggs, sliced
1 cup shredded red cabbage
1 small red onion, chopped
2 medium carrots, shredded
1 cup diced fully cooked ham, optional
1 cup frozen peas, thawed
1 cup shredded monterey jack cheese
1 cup miracle whip
1/2 cup sour cream
1/2 cup chopped green onions
1 tablespoon spicy brown mustard
1 teaspoon sugar
salt & pepper to taste

Cook macaroni according to package directions; drain and rinse in cool water.  Transfer to a bowl.  Drizzle the noodles with the oil and toss to coat.

Place the lettuce evenly across the bottom of a 9 x 13 pan.  Top with green peppers, cucumber, macaroni, eggs, cabbage, red onion, carrots, ham, peas & cheese.

In a small bowl combine the miracle whip, sour cream, green onions, mustard, sugar, and salt & pepper.  Spread over the top of the salad.  Cover and refrigerate overnight.
Just before serving you can sprinkle some more green onions or freshly grated Parmesan cheese on the top.

Lovely & delicious! Enjoy!

Wednesday, May 11, 2011

Completo's (Chilean Hot Dog) for Save the Children!

Frigidaire and Jennifer Garner are hitting the field at the Stain Games this week in support of Save the Children's efforts to promote healthier lifestyles for children living in poverty. You can join in the fun from home by taking a virtual swing at http://www.maketimeforchange.com/. When you do, Frigidaire will donate up to $1 to Save the Children. Plus, to help spread the word, everyone who participates will be entered for a chance to win a new Frigidaire Affinity washer and dryer featuring Ready Steam™.

Foodbuzz has also asked it's featured publishers to post a healthy summer baseball recipe to help create awareness of the Save the Children Campaign & the Stain Games.  So with that we started thinking of what foods baseball and summer remind us of...we came up with HOT DOGS!!  But hot dogs (especially those yummy chili cheese dogs) can be not soon the healthy side.  But this is a great recipe for making that dog yummy & healthy for your children!

Not only are these healthy but they are so stinkin' good!!  I'd never been much of a hot dog fan until I met this hot dog!!  My little brother Brandon served a mission in Chile and came home and introduced us all to these dogs.  He says they're not the same as what they have in Chile, but they sure are the best hot dog I've ever had!!  They are perfect for spring and baseball season...I always crave them this time of year!!

Completo's (Chilean Hot Dog)
Hot dogs (preferably all beef or turkey...light would be great too!), grilled to your liking
Homemade or Deli Hot Dog Rolls (whole grain is SOOO good with these!!)
Guacamole (recipe below)
Sweet Pickle Relish
Diced Tomatoes
Ketchup
Mustard
Shredded cheese (preferably light!)

How to make the perfect Guacamole for Completo's:
2 ripe avocados
Dash of freshly ground black pepper
1/2 teaspoon freshly grated coarse salt
2 teaspoons lime juice
1/4 teaspoon garlic powder

Cut avocados in half and remove the pit.  Scoop out the avocado with a spoon and put into a medium sized bowl.  Mash the avocado with a fork until the desired consistency (I like mine a little on the chunky side, but you can mash it really smooth if you like).  Add the salt & pepper, lime juice, and garlic powder and mix to combine.  Serve immediately or it will brown on you...still is good, just doesn't look as appetizing!:)

So here's how you build your completo:
Take you bun and put a dog in it.  Then top it with some pickle relish & then a couple of Tablespoons of guacamole.  Next you want to put your diced tomatoes on...you want to put them on right after the guacamole because they will "stick" to it and not fall off!  Next put on your ketchup & mustard and then sprinkle on some cheese! 

My kiddo's even like these and they are so much better for you than chili cheese dogs (and so much better in my opinion!)

Hope you enjoy & don't forget to go take a "virtual swing" for Save the Children at http://www.maketimeforchange.com/!!  Thanks!!

Monday, May 9, 2011

PW's Pig Cake

I've been wanting to try this recipe from Pioneer Woman for a while now and finally got around to doing it for Mother's Day!  It was really good...reminded me a lot of our Hawaiian Cake recipe.  I actually think I'd like to combine the two.  I liked the Cake of the Pig Cake better, but I like the topping on the Hawaiian Cake better than the Pig Cake, but they are both really good!!  I'll try that eventually and let you know!:)

PW's Pig Cake
For the Cake:
1 box Yellow Cake Mix
1 stick margarine, softened
1 can (14 oz.) mandarin oranges, drained, 1/2 cup juice reserved
4 eggs
1 teaspoon vanilla

For the Topping:
1 small package instant vanilla pudding mix
1 can (20 oz) crushed pineapple, juice reserved
1/2 cup powdered sugar
4 oz. Cool Whip
extra mandarin orange slices for garnish

Preheat oven to 350 degrees.  For the cake, combine the cake mix, margarine, 1/2 cup of juice from the mandarin oranges, eggs, and vanilla.  Beat for 4 minutes.  Add drained oranges and beat again until all the pieces are broken up and small.  Pour batter in a greased and floured 9 x 13 inch pan and bake for 25-30 minutes.  Remove from the oven and cool completely.  When cooled, turn out cake onto a large platter (or a cookie sheet...that's all I had that it would fit on!!)

Once the cake is cooled, blend the juice from the pineapple with the vanilla pudding.  Add sugar and mix again.  Then mix in the whipped topping.  Stir in drained pineapple.  Spread on cake and refrigerate for several hours. 

Before serving place a mandarin orange on each cake square!  Beautiful & delicious!


Wonderful Mother's Day spent with THE BEST family ever!!

These first 2 I picked out for myself from Tony (hubby)!:)  I absolutely LOVE both of them!!  (I think I've got a little bit of an addiction!)
Isn't it GEORGEOUS!!
And oh how I love these as well!!  The original plates for my plate stand were broken about a year ago and I've been on the search ever since for something that would fit that I liked...WELL I FOUND THEM!!  And not only do I get the plates for my stand but also got a bonus bowl and mug (that are both oversized...I'm going to love them as well!!)  This picture doesn't do them justice either...they are beautiful!!

As much as I love my new dishes...these were my favorite presents of the day!!

From Kyla & Tony
(flowers from Tony...art work from Kyla)
Here's the back of Kyla's artwork:
And from Caleb:
"Top Ten Reasons Why I Love My Mom"
These were 2 of my favorites
I'm so glad my boy thinks I'm beautiful!!  And such a great similie!!
And I'm glad he likes my cooking!!

And from Eli:
Here's the poem in the inside:

And Rhett made me a card...he gave it to me and then took it back because he liked it...and now I can't find it!:)  But that boy must have told me 3 or 4 times throughout the day yesterday "Happy Mother's Day Mom!"  And would give me a big hug.  That's what I love the most!!

And yes...to those wondering I had the best omelet in the world yesterday for breakfast!!:)
Tony also made The Best Enchilada's Ever, along with some melon...pictured in my new bowl above!  Then we had some delicious cake for dessert...recipe will be posted soon!

It was a wonderful Mother's Day...I am so blessed to have been raised by a wonderful Mother who is still the best Mom around and such a great Grandma to my children!  I'm so thankful for her.  She's the one who taught me how to cook and bake and I'm now hoping to instill that in my daughter.  And I think it's working!!:)

I'm also so blessed to have such wonderful children who I love dearly!  I love watching & participating in their accomplishments and watching them grow into who they are going to become...and so far I like what I'm seeing!

Hope everyone else had a fabulous Mother's Day as well...with wonderful food to share!:)

Saturday, May 7, 2011

Mother's Day Omelet

My hubby Tony makes THE BEST omelet's in the world!!  And I almost always get one in bed for Mother's Day...so I'm looking forward to it tomorrow!!:)  Anyway, I made him go through the ingredients and steps with me so you could all try them. 

Here's an idea for all you mother's out there.  Print out the recipe and place it somewhere your hubby will see it...maybe he'll get the hint???  Or just make it yourself...either way you won't be disappointed!

Mother's Day Omelet
(this picture makes me salivate...so yummy!)
3 eggs
1 Tablespoon canned diced green chillies
1/3 teaspoon salt
1/8 teaspoon pepper
1 teaspoon oil

1/2 of a small red onion, chopped
1/2 of a green pepper, chopped
Fully cooked ham, chopped
 (or breakfast meat of your choice...bacon & sausage work well too!)
Cheese (Tony likes to use Kraft cheddar singles & swiss, but you can use whatever cheese you like)

Heat the 1 teaspoon of oil in a small frying pan over medium heat.  Add the onion and peppers and cook for about 5 minutes or until they are tender.  Add the ham and heat through.  Set aside.

Warm up another small frying pan over medium heat.  Spray with cooking spray so your egg won't stick!  Put the eggs in a small (2 cup size) pourable measuring cup and whisk until all mixed.  Add the green chillies and the salt and pepper and mix until combined.  Pour egg mixture into your frying pan and cook for about 3 minutes or until the bottom is lightly browned.  Now for the tricky part!  (This is the only step Tony lets me help him with because he's not the best flipper!)  Grab a wide spatula and work your way around the omelet losening up all the edges and underneath.  Slide the spatula under the omelet and carefully flip!  If it doesn't quite make it that's alright, it may not look the best but it will still taste great!

While the other side is cooking, take one slice of each kind of cheese you want and cut it in half.  Place the cheeses on one half of you omelet.  Place a few Tablespoons of your onion, pepper, ham mixture on top of the cheese (still on only half of your omelet).  Now take your spatula and fold the side that doesn't have anything on it over top the other side.  Remove from the pan onto a plate. 

 Add some toast & a glass of orange juice and you've got an excellent Mother's Day breakfast!!

Thursday, May 5, 2011

Happy Cinco de Mayo!!

Here's some fabulous foods to celebrate Cinco de Mayo!!


And for dessert, these sopapillas are delicious...just make sure to do the powdered sugar on them & they make an excellent dessert. 
Or you could make these:  they are one of my all-time favorites...not very cinco de mayo, but very yummy and perfect for spring!!
Lemon Cheesecake Bars!!

Hope everyone has a wonderful Cinco de Mayo with some wonderful food and family!!

Wednesday, May 4, 2011

Decadent Dark Chocolate Walnut Cookies

It's Teacher Appreciation Week for those who didn't already know.  We've got 3 kids in Elementary School right now (although this is the last year that will happen...Kyla heads to Middle School next year and by the time Rhett is in Kindergarten Caleb will be in Middle School as well...crazy to think about that!!) and I've got a husband who is an Elementary School teacher (2nd grade...for 9 years!!), so I feel I've got a pretty good idea how hard teachers work & that they need and deserve some appreciation!! 

When Tony chose teaching as his occupation I didn't realize how much work it really would be...I was just exctied to have him through the summers and during holidays (which is a HUGE perk...although all but his first year of teaching he's held some kind of summer job!!) 

Since he's been working 9 years as a teacher now I think I understand better than most mom's how much work & dedication teachers put into their jobs!  If I can brag about my hubby for a moment...He's up around 6:00 every morning (and he lets me sleep-in until 7:15!!), is to the school by 7:30 at the latest, home by 5:00 at the earliest...it's usually 5:30 or 6:00 before he's home.  Not to mention the many hours a week during the evenings and weekends that he's correcting homework or doing lesson plans.  He comes home with such fun stories to tell (and some quite disturbing ones as well!!) & I've heard numerous times how he would love to adopt this student and that student.  If he got to keep all the students he's wanted to over the years we'd be bursting at the seams at our home!!

And I know he's not the only teacher like that...our children have now and have had in the past some amazing teachers who spend so much time teaching our children!  In my opinion they more than deserve those summer months off!!  (although as I said, my hubby works a summer job, as do many teachers...as well as spend time in their classroom getting things ready for the next year!)

I'm so appreciative for the teachers that we have & for a wonderful husband who loves being a teacher and is SOOOO good at it! (I know I'm biased but I think he's spectacular!!) 

So with that, for teacher appreciation week we decided to make some cookies to take to their teachers.  I know it's small but I also know (from Tony) that it's not the gift or treat that teachers appreciate but the knowing that they are appreciated and that parents are grateful for all they do!  So that's what we were trying to accomplish here!

So we made some wonderful adult cookies for them!:) 

Decadent Dark Chocolate Walnut Cookies
We just used Chad's Chocolate Chip Cookie recipe & changed the add-ins!  PERFECT!!

1/2 cup shortening
1/2 cup butter or margarine (I used margarine)
1/2 cup sugar
1 cup brown sugar
1/2 teaspoon baking soda
2 eggs
1 teaspoon vanilla
2 1/2 cups flour (I ended up using 3 cups)
1 3/4 (10 oz. bag) Dark Chocolate Morsels
1 cup chopped walnuts

Cream shortening & butter together until mixed well.  Add the sugars and baking soda and mix until light and fluffy.  Add the eggs and vanilla and incorporate well.  Add the flour and mix until you have a slightly sticky dough (I used 3 cups again!).  Add the chocolate chips and walnuts and mix until incorporated. 

Drop using a 2 Tablespoon scoop onto a cookie sheet and bake at 375 degrees for 8-10 minutes.  Let sit on pan for 2 minutes and then transfer to a wire rack to cool. 

We put them in a bag and tied the little note to the bag with some curling ribbon!
I absolutely LOVED the walnut and dark chocolate in these...perfection!!  But any cookie would do...Here's all of our cookies...they are all fabulous!

Tuesday, May 3, 2011

Congo Bars

When we saw these bars over at Mel's Kitchen Cafe, we knew we had to try them...and soon!!  We had the perfect opportunity when we had company over (the elders) last Friday!  We loved the mix of the 2 different brownies and the chocolate ganache on top was the perfect addition!  Kyla helped with that part!

Congo Bars
Recipe from Mel's Kitchen Cafe
PRINT RECIPE
Congo Layer:
1 1/3 cups flour
1 1/4 teaspoon baking powder
1/4 teaspoon salt
6 Tablespoons butter
1 1/4 cups firmly packed brown sugar
1 large egg
1 large egg white (save the egg yolk for the brownie layer!)
1 teaspoon vanilla
1 cup chopped walnuts or pecans (we used pecans)

Brownie Layer:
1 cup plus 2 tablespoons flour
1/4 cup unsweetened cocoa powder
1/8 teaspoon baking powder
1/4 teaspoon salt
1/2 cup butter (1 stick)
1/2 cup semisweet chocolate chips
3/4 cups sugar
2 large eggs, lightly beaten
1 large egg yolk
2 teaspoons vanilla

Ganache Drizzle:
3 Tablespoons heavy cream
1/2 cup semisweet chocolate, finely chopped (or chocolate chips work well)

Preheat oven to 350 degrees.  Line a 9X13 inch pan with foil and lightly grease & flour (we forgot to flour the pan & it didn't stick at all!).

For the Congo layer:  In a small bowl stir together the flour, baking powder, and salt.  In a large bowl or mixer stir together the butter, brown sugar, egg, egg white, and vanilla until just blended.  Stir in the flour mixture until the batter is smooth.

Scoop the batter into the prepared 9X13 pan and spread it to cover the pan as evenly as possible.  Sprinkle with the walnuts or pecans and gently press them into the batter.

Partially bake the congo bar for 12-15 minutes...you want the top to be no longer shiny and begin to start pulling away from the sides of the pan.  Place pan on a wire rack to cool.

For the Brownie layer:  In a small bowl, stir together the flour, cocoa powder, baking powder, and salt.  In a small saucepan, melt the butter and chocolate over very low heat, stirring until smooth.  Transfer to a medium bowl and let cool for 5 minutes.

Stir the sugar into the chocolate mixture until combined.  Add the eggs, egg yolk, and vanilla and stir until well blended.  Stir in the flour mixture just until the batter is smooth.  Scoop the batter over top the still warm congo layer and spread as evenly as possible.

Put back in the oven and cook for about 20 minutes.  The top needs to appear set and feel firm, and a toothpick inserted should come out with moist crumbs attached.  Place the pan on a wire rack to cool completely.  The top layer will set up as it cools as well.

To make the Ganache drizzle:  Place the chocolate in a medium bowl.  In a small saucepan or in your microwave, bring the cream just to a boil.  Pour the cream over the chocolate and let sit for 30 seconds.  Whisk together until smooth and creamy.  Set the mixture aside for a bit until it begins to cool and thickens slightly.

Pour the warm glaze into a small ziploc bag.  Take one of the corners and cut a small opening to allow a thin glow of glaze.  Squeezing lightly, pipe lines of chocolate in a zig-zag pattern over the brownie.  Set aside until the chocolate glaze is set.

Eat it with some vanilla ice cream or cool whip on top...or as is...and ENJOY!  We sure did!!

Monday, May 2, 2011

Homemade Enchilada Sauce

I found this recipe years ago and tweaked it a little to fit our tastes.  It is so yummy and I actually prefer it over any store bought brand and it is SOOOO easy to make.  Sometimes I'm just feeling super lazy and I'll use a store bought can of sauce, but would prefer this one hands down anytime!!

It is also the perfect amount of sauce for Enchilada Casserole!

Enchilada Sauce
2 Tablespoons vegetable oil
2 Tablespoons flour
2 Tablespoons chilli powder
1/2 teaspoon cumin
1 can (8 oz.) tomato sauce
2 cups water
1 teaspoon salt
1/4 teaspoon garlic powder
cheyenne pepper (optional)

Heat oil in a 2 quart saucepan.  Stir in the flour an chilli powder and cook for 1 minutes stirring constantly.  Add the remaining ingredients and bring to a boil.  (If you like a little kick to your enchilada sauce you can add some cheyenne pepper...just a dash will do it!)  Reduce heat and simmer for 10 minutes. 

Isn't that a piece of cake??!!  You'll never go back to store brands again!!
Related Posts Plugin for WordPress, Blogger...